Installing the GPU Operator on OpenShift 4.6
In my last article, I showed how to deploy OpenShift 4.6 on top of OpenStack with GPU worker nodes. In this article, I will deploy the NVIDIA GPU Operator onto the OpenShift cluster. I will use Operator Hub to complete the deployment. You could do all of this via CLI, but I thought the visuals would be useful.
Red Hat OpenShift Entitlement
If you haven’t applied an entitlement to your cluster, you will see the following error when the NVIDIA driver container starts running through its processes.
...
+ echo 'Installing elfutils...'
Installing elfutils...
+ dnf install -q -y elfutils-libelf.x86_64 elfutils-libelf-devel.x86_64
Error: Unable to find a match: elfutils-libelf-devel.x86_64
...
You can download the entitlement certificate zip file from the Red Hat Customer Portal page for one of your entitled systems.
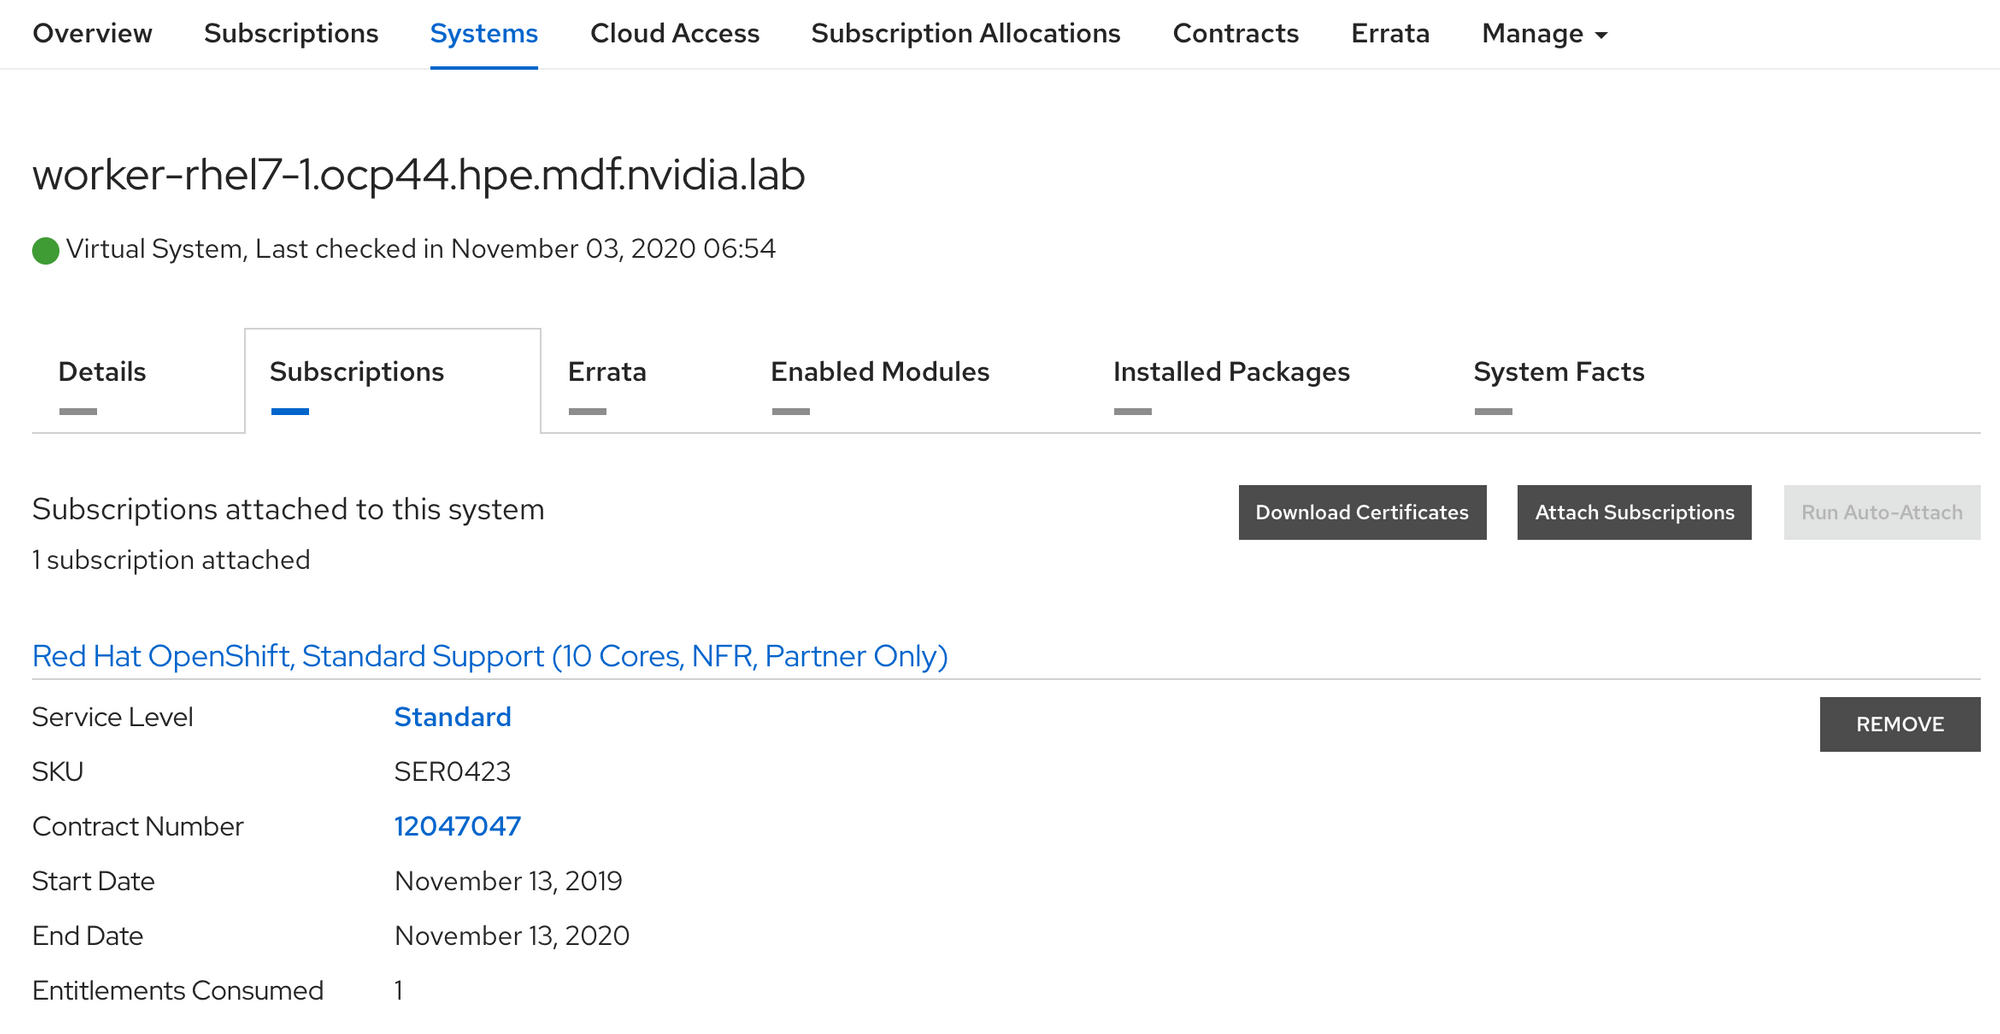
The steps below show applying a cluster wide entitlement via the machine-config operator. Note that your nodes will reboot as part of applying the entitlement via machine-config. You should wait for all nodes to reboot and go back to ready state before proceeding.
[cloud-user@ocp-provisioner certificate]$ unzip worker-rhel7-1_certificates.zip
Archive:  worker-rhel7-1_certificates.zip
signed Candlepin export for 94738b92-79a4-4749-bbc1-97c45a5ab66b
  inflating: consumer_export.zip
  inflating: signature

[cloud-user@ocp-provisioner certificate]$ ls
consumer_export.zip  signature  worker-rhel7-1_certificates.zip

[cloud-user@ocp-provisioner certificate]$ unzip consumer_export.zip
Archive:  consumer_export.zip
Candlepin export for 94738b92-79a4-4749-bbc1-97c45a5ab66b
  inflating: export/meta.json
  inflating: export/entitlement_certificates/7719687874320734928.pem

[cloud-user@ocp-provisioner certificate]$ grep "\----" export/entitlement_certificates/7719687874320734928.pem
-----BEGIN CERTIFICATE-----
-----END CERTIFICATE-----
-----BEGIN ENTITLEMENT DATA-----
-----END ENTITLEMENT DATA-----
-----BEGIN RSA SIGNATURE-----
-----END RSA SIGNATURE-----
-----BEGIN RSA PRIVATE KEY-----
-----END RSA PRIVATE KEY-----

[cloud-user@ocp-provisioner certificate]$ cp export/entitlement_certificates/7719687874320734928.pem nvidia.pem

[cloud-user@ocp-provisioner certificate]$ curl -O  https://raw.githubusercontent.com/openshift-psap/blog-artifacts/master/how-to-use-entitled-builds-with-ubi/0003-cluster-wide-machineconfigs.yaml.template
  % Total    % Received % Xferd  Average Speed   Time    Time     Time  Current
                                 Dload  Upload   Total   Spent    Left  Speed
100  5084  100  5084    0     0  22798      0 --:--:-- --:--:-- --:--:-- 22798

[cloud-user@ocp-provisioner certificate]$ sed  "s/BASE64_ENCODED_PEM_FILE/$(base64 -w0 nvidia.pem)/g" 0003-cluster-wide-machineconfigs.yaml.template > 0003-cluster-wide-machineconfigs.yaml

[cloud-user@ocp-provisioner certificate]$ ../4.6/oc create -f 0003-cluster-wide-machineconfigs.yaml
machineconfig.machineconfiguration.openshift.io/50-rhsm-conf created
machineconfig.machineconfiguration.openshift.io/50-entitlement-pem created
machineconfig.machineconfiguration.openshift.io/50-entitlement-key-pem created

#Verify entitlement is applied
[cloud-user@ocp-provisioner ~]$ ./4.6/oc get machineconfig | grep entitlement
50-entitlement-key-pem                               2.2.0             92s
50-entitlement-pem                                   2.2.0             92s
After entitlement is applied and all nodes have rebooted, you may proceed with the GPU Operator deployment. You’ll be able to see in the NVIDIA driver container logs that the previously failing package install now completes (along with the rest of the processes).
...
Installing elfutils...
+ echo 'Installing elfutils...'
+ dnf install -q -y elfutils-libelf.x86_64 elfutils-libelf-devel.x86_64
+ rm -rf /lib/modules/4.18.0-193.24.1.el8_2.dt1.x86_64
+ mkdir -p /lib/modules/4.18.0-193.24.1.el8_2.dt1.x86_64/proc
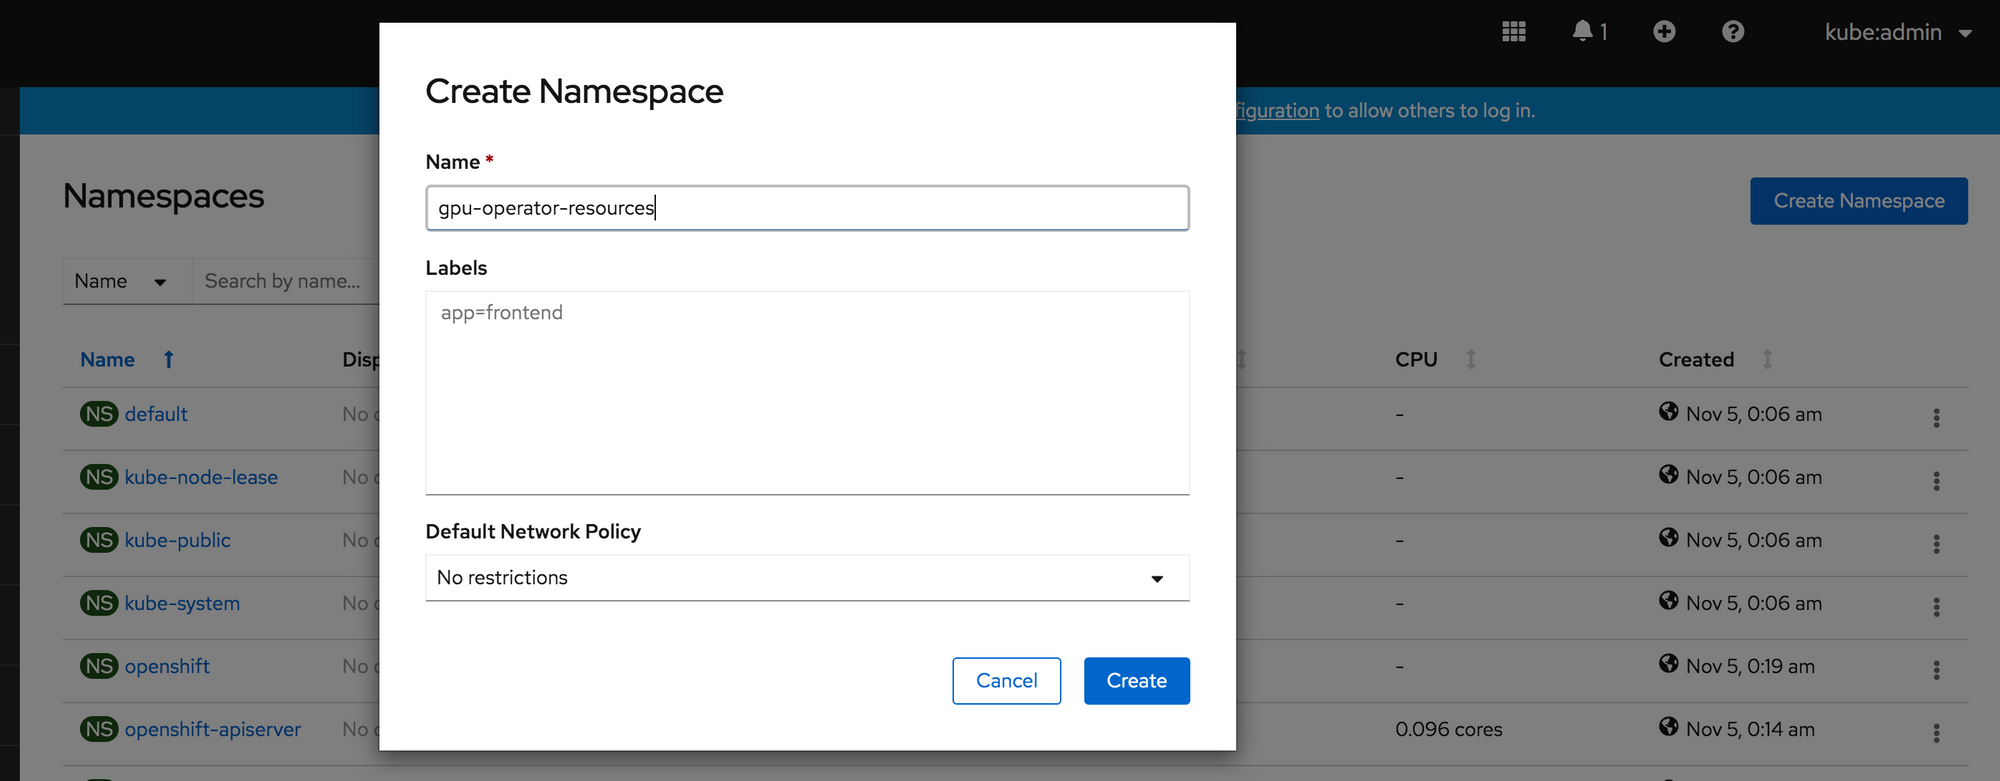
...Create A Namespace
First we will create a namespace for the GPU Operator resources to live. In OpenShift Administrator console go to Administration -> Namespaces. Name it “gpu-operator-resources”.
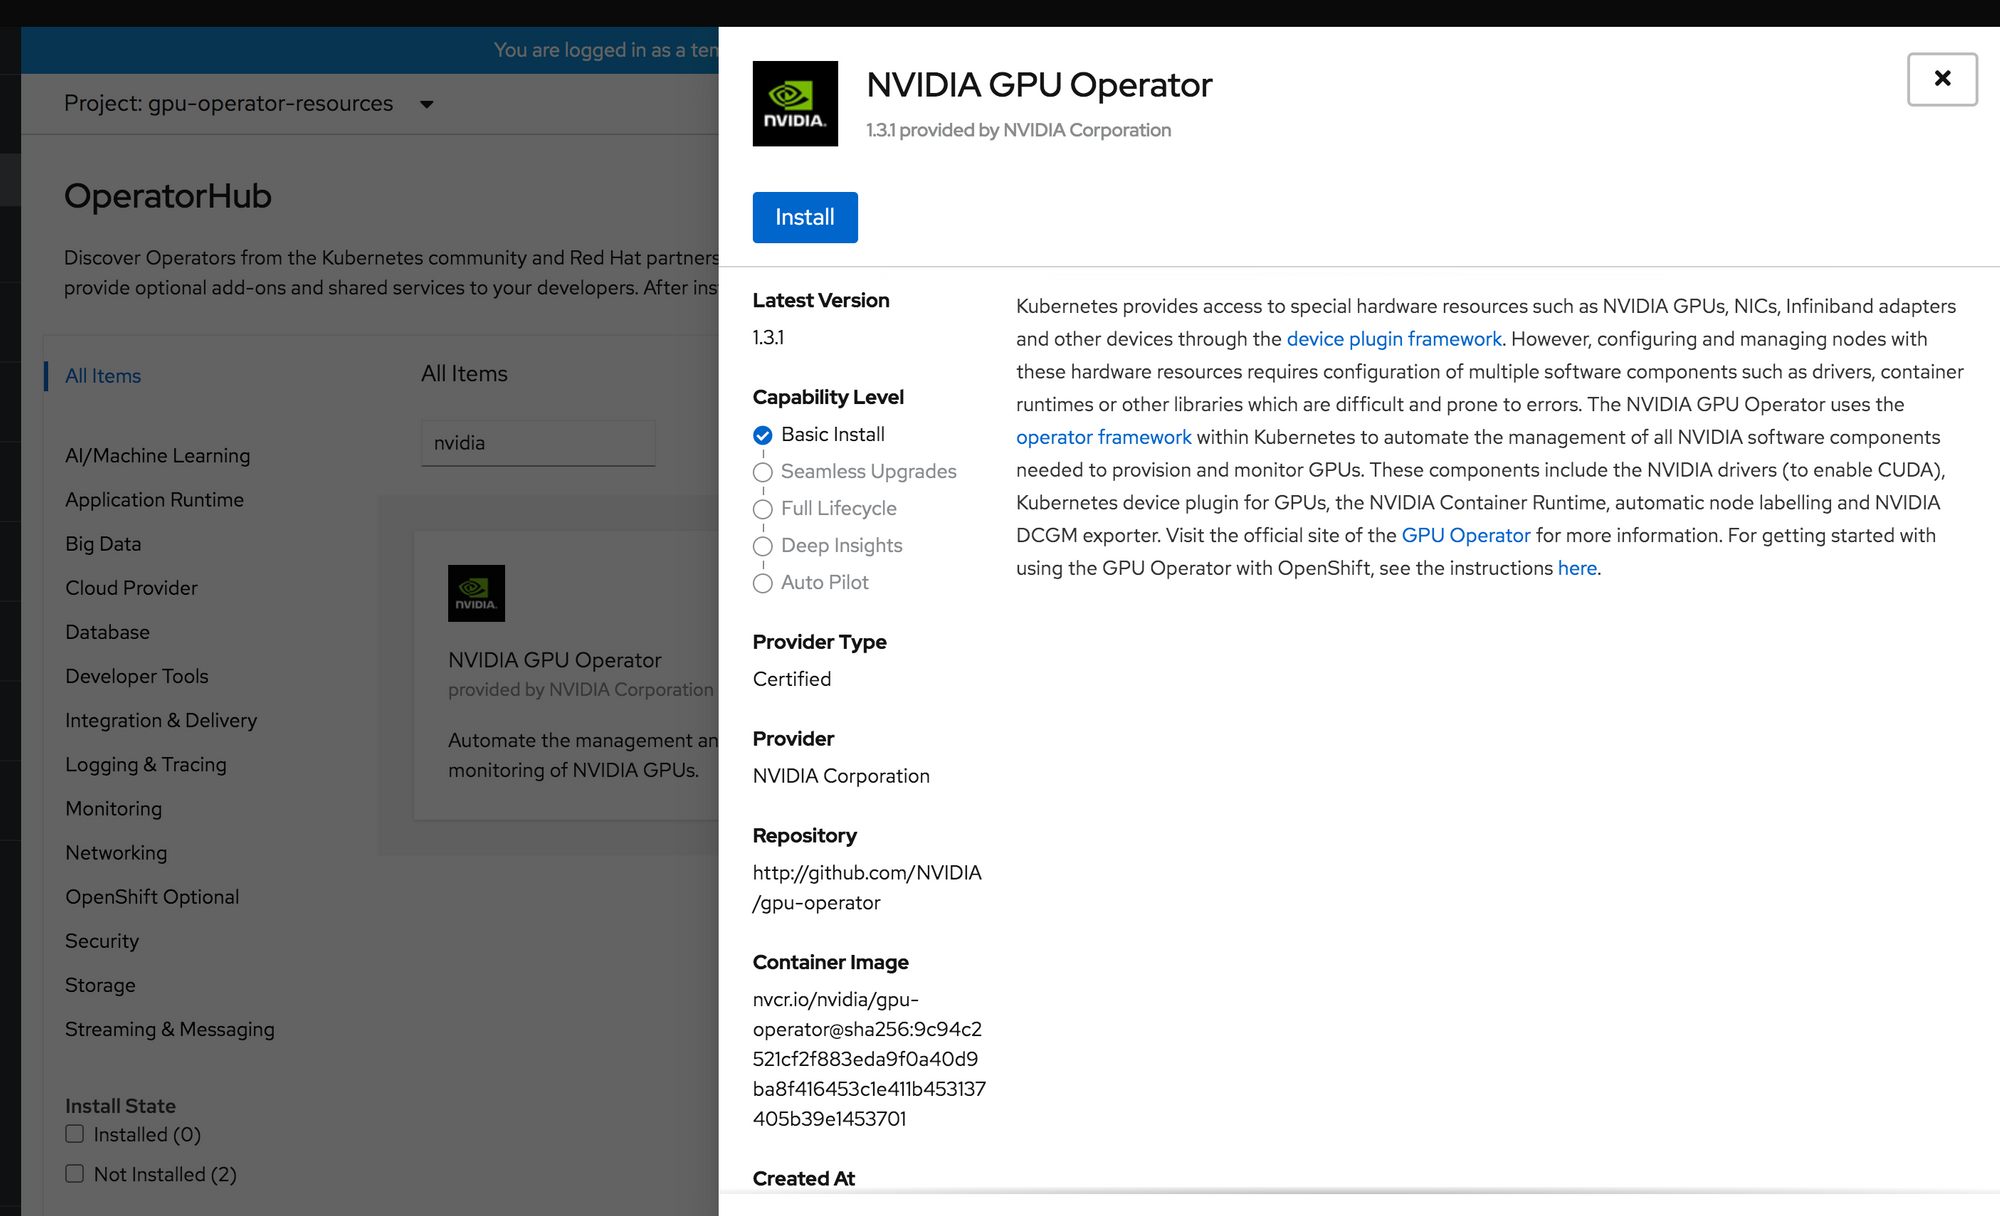
Install the NVIDIA GPU Operator from Operator Hub
In OpenShift, head to Operator Hub in the Administrative Console. Search for NVIDIA. You will notice there are two operators shown. One have Marketplace designation. For this lab environment, I chose the non-marketplace operator as I am just testing out the deployment. Click the Install button.
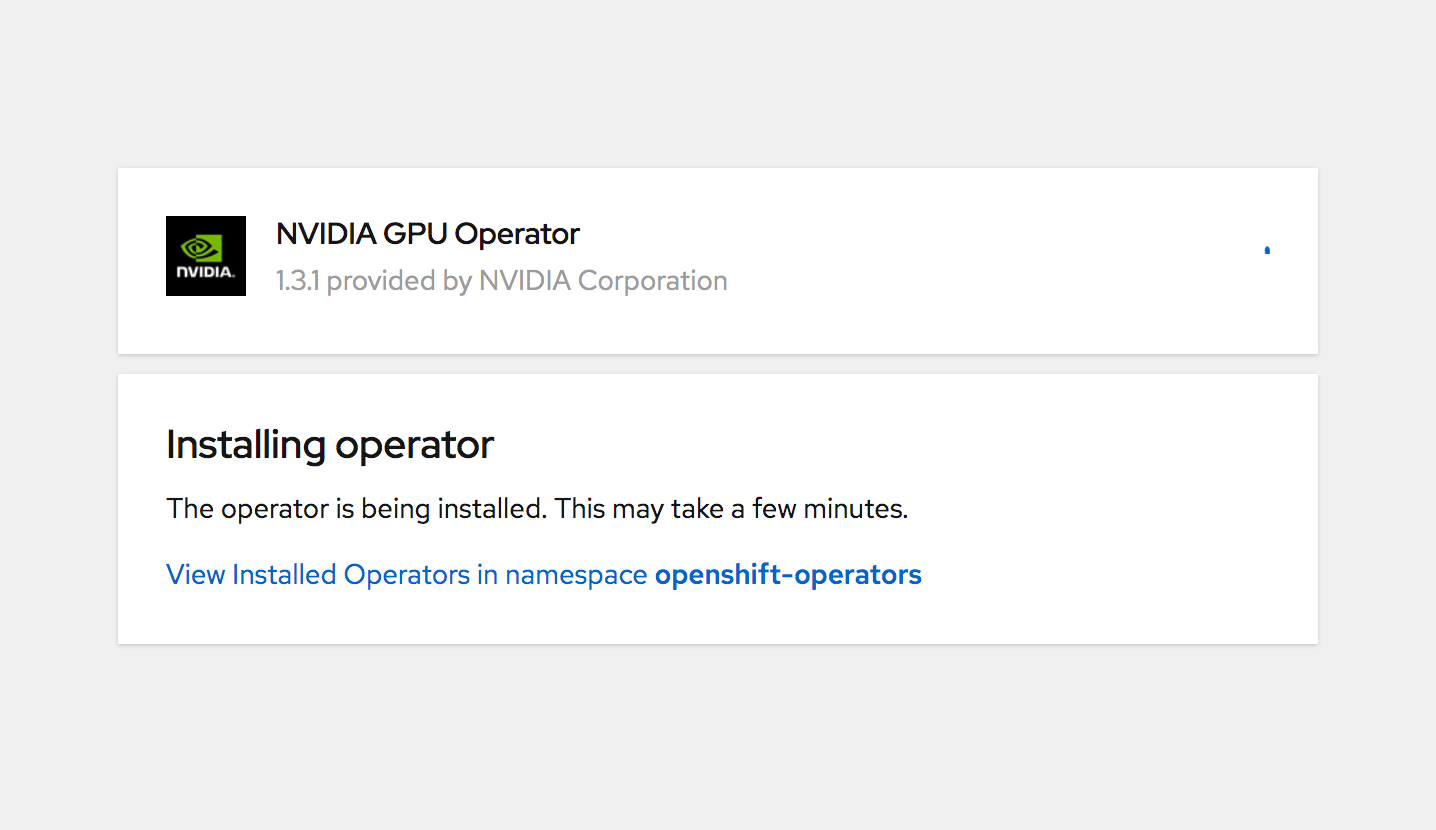
You will see a screen that shows progress of the operator installation. It is important to note that this is not deploying the components of the operator. It is simply installing the Operator to make available for deployments.
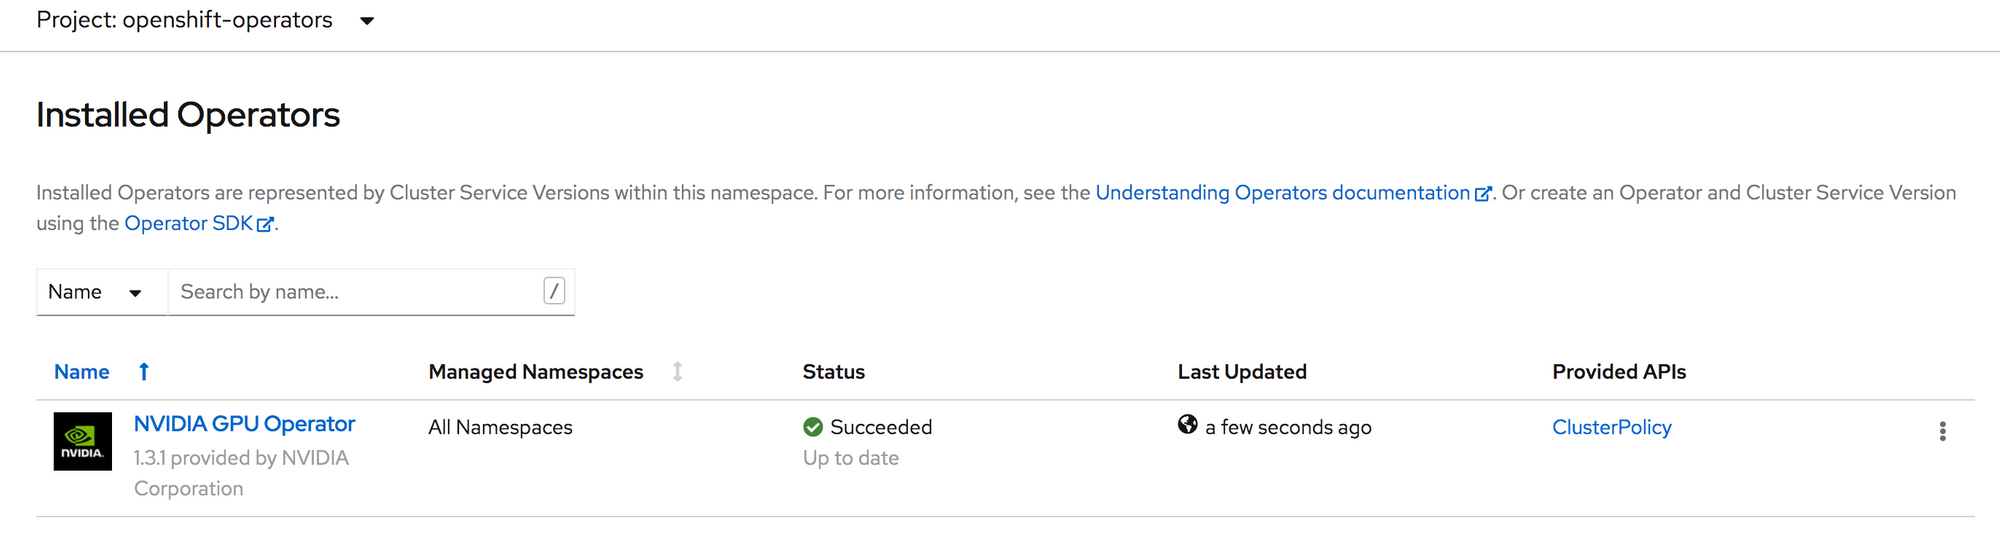
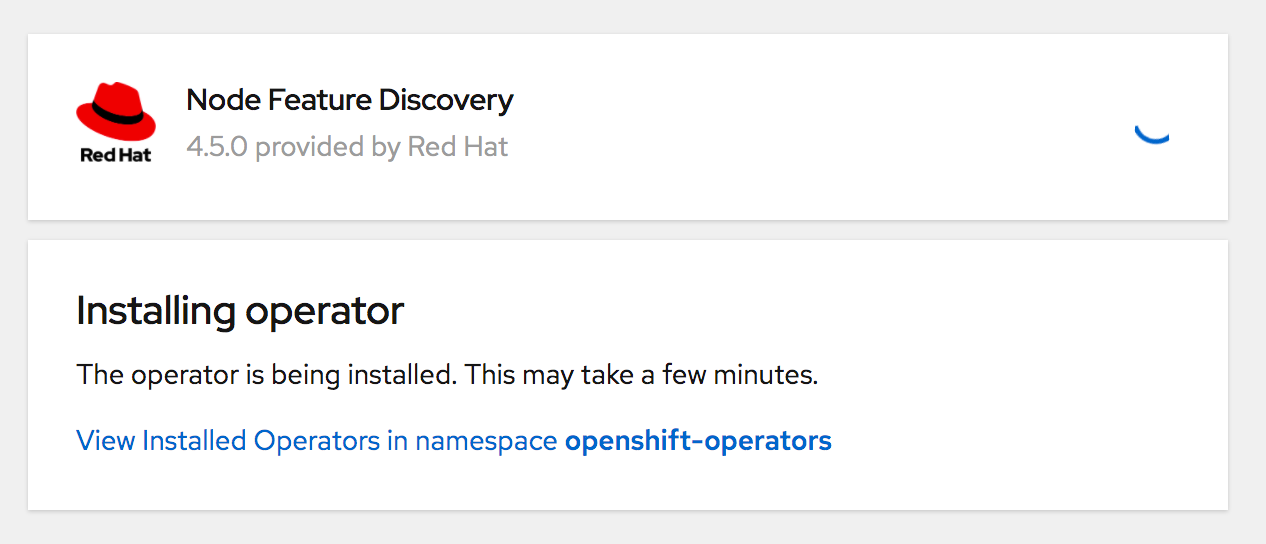
Once the installation completes, you should see a status like below under Installed Operators in OpenShift.
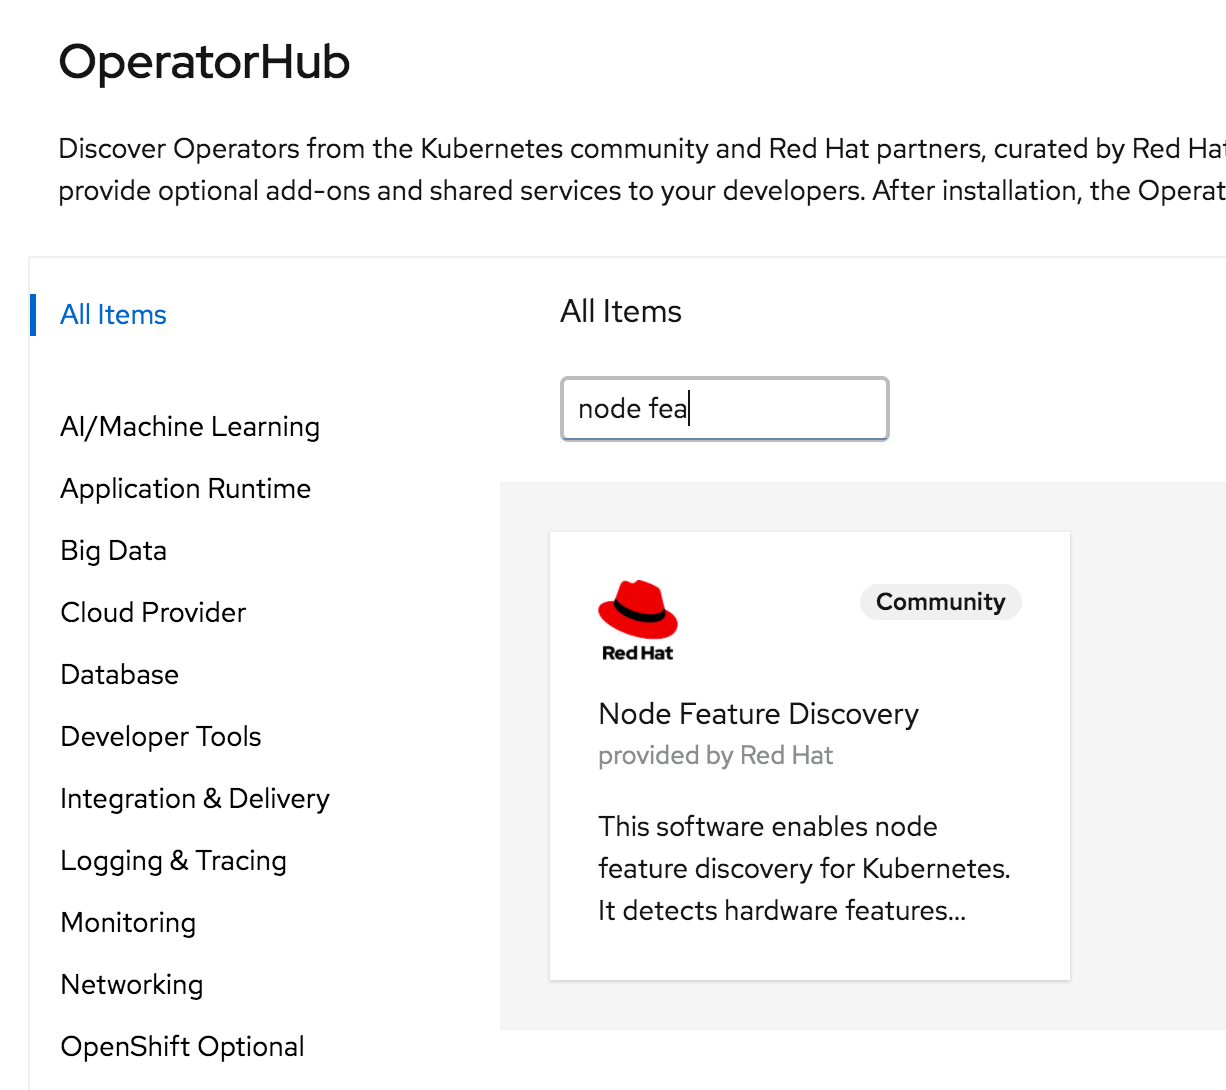
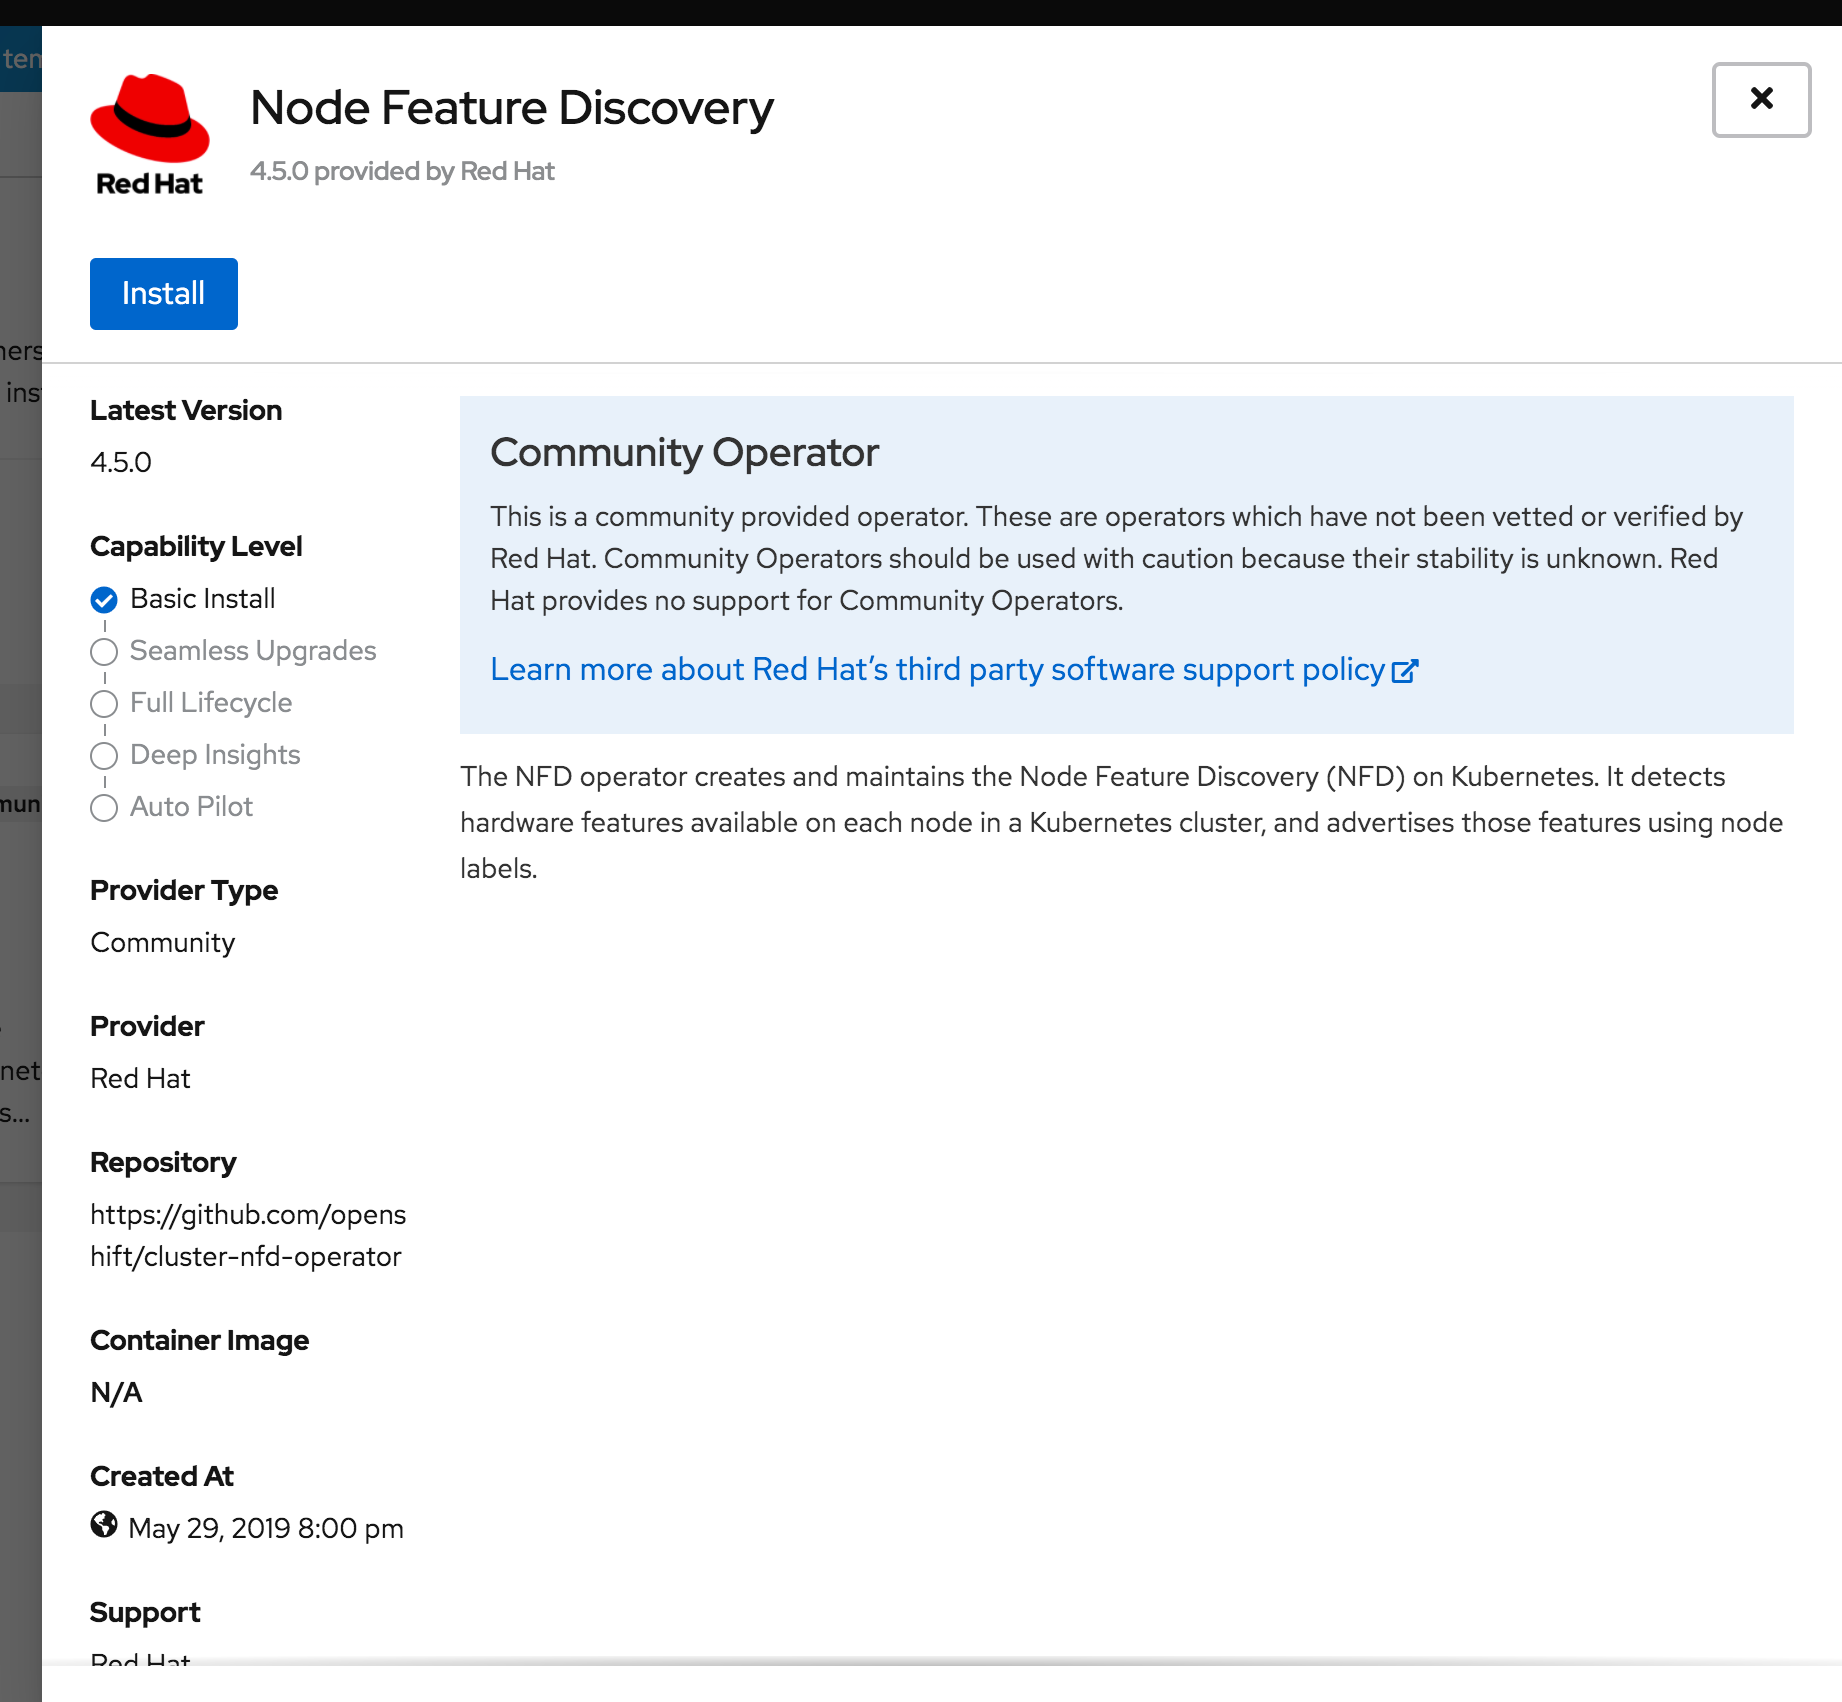
Install the Node Feature Discovery (NFD) Operator from Operator Hub
Head back to the Operator Hub in OpenShift. Search for Node Feature Discovery.
Click Install.
Wait for the installation to complete.
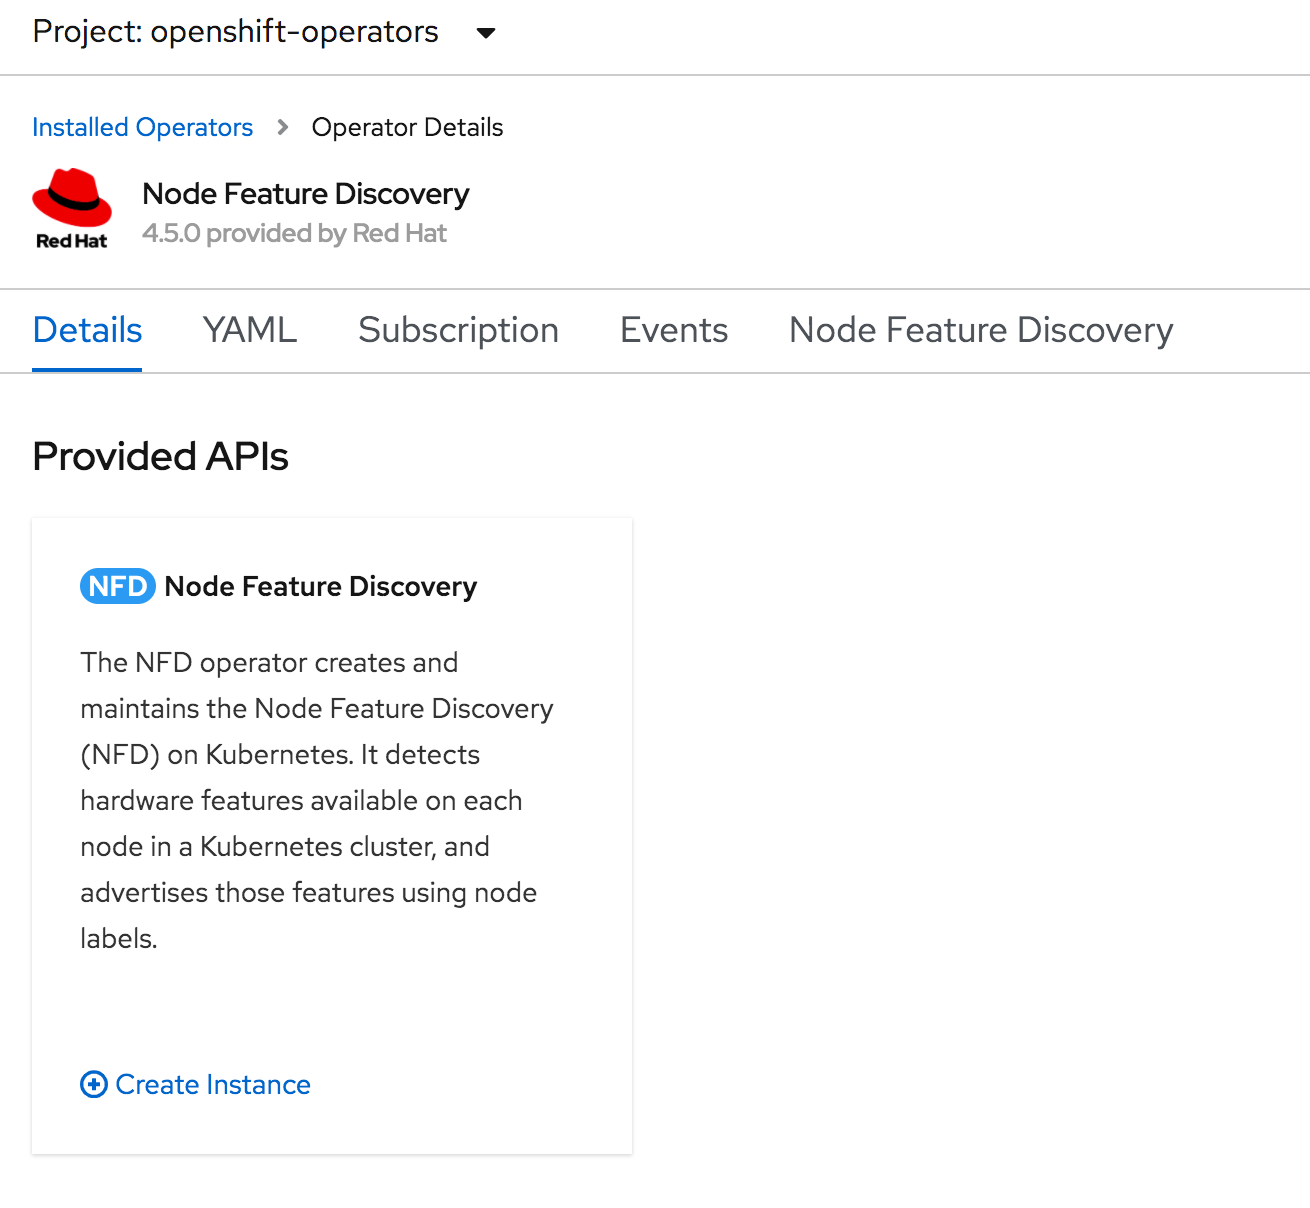
Now you should see both the NVIDIA GPU Operator and Node Feature Discovery operator in a Succeeded state.

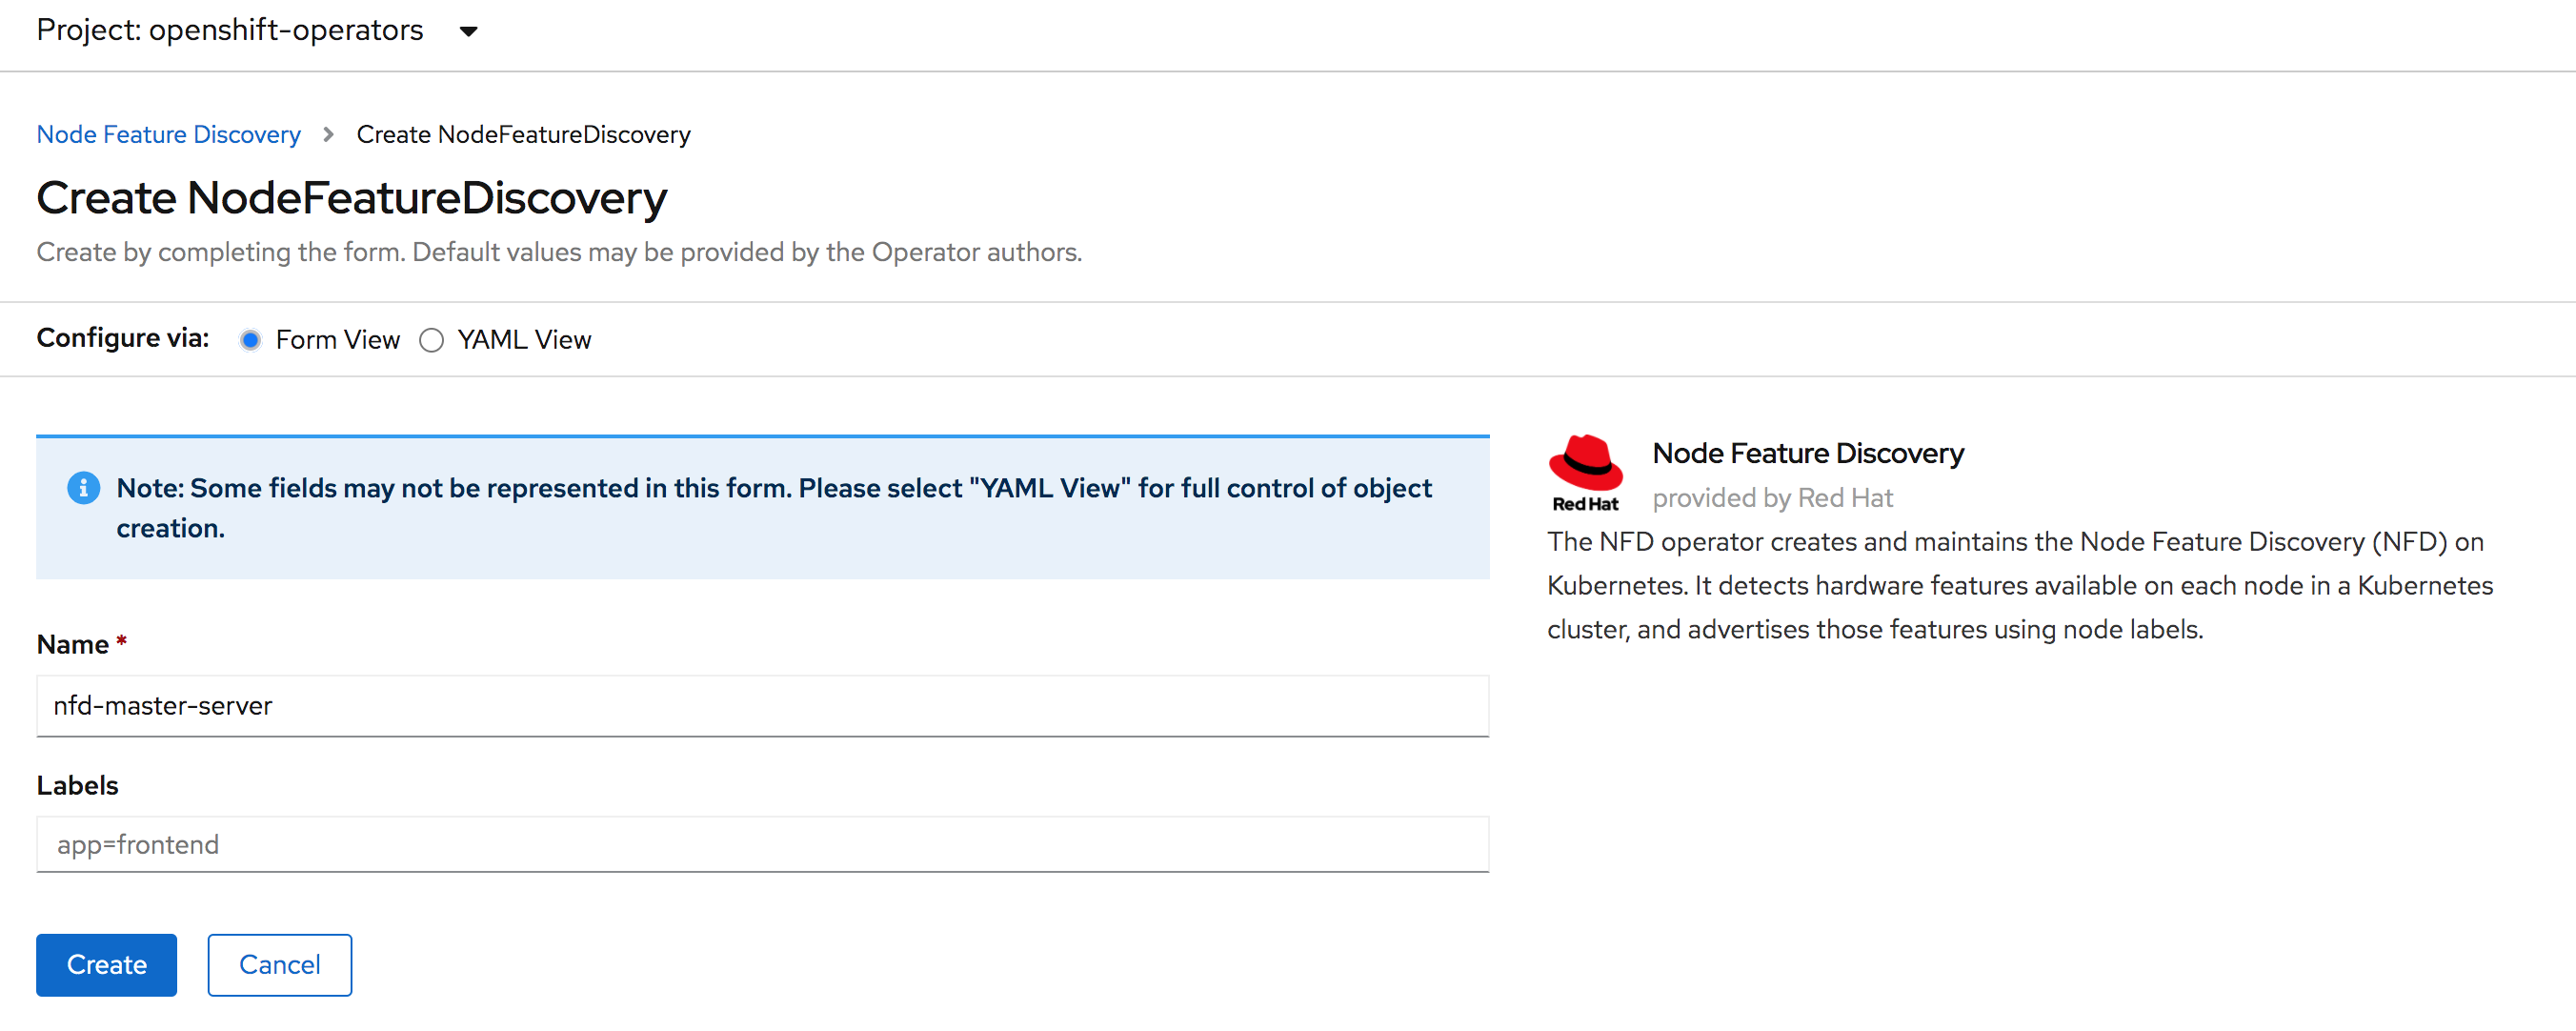
Create an Instance of NFD Click on Node Feature Discovery in the list. On the Details page click Create Instance.
Leave the form as is and click Create.
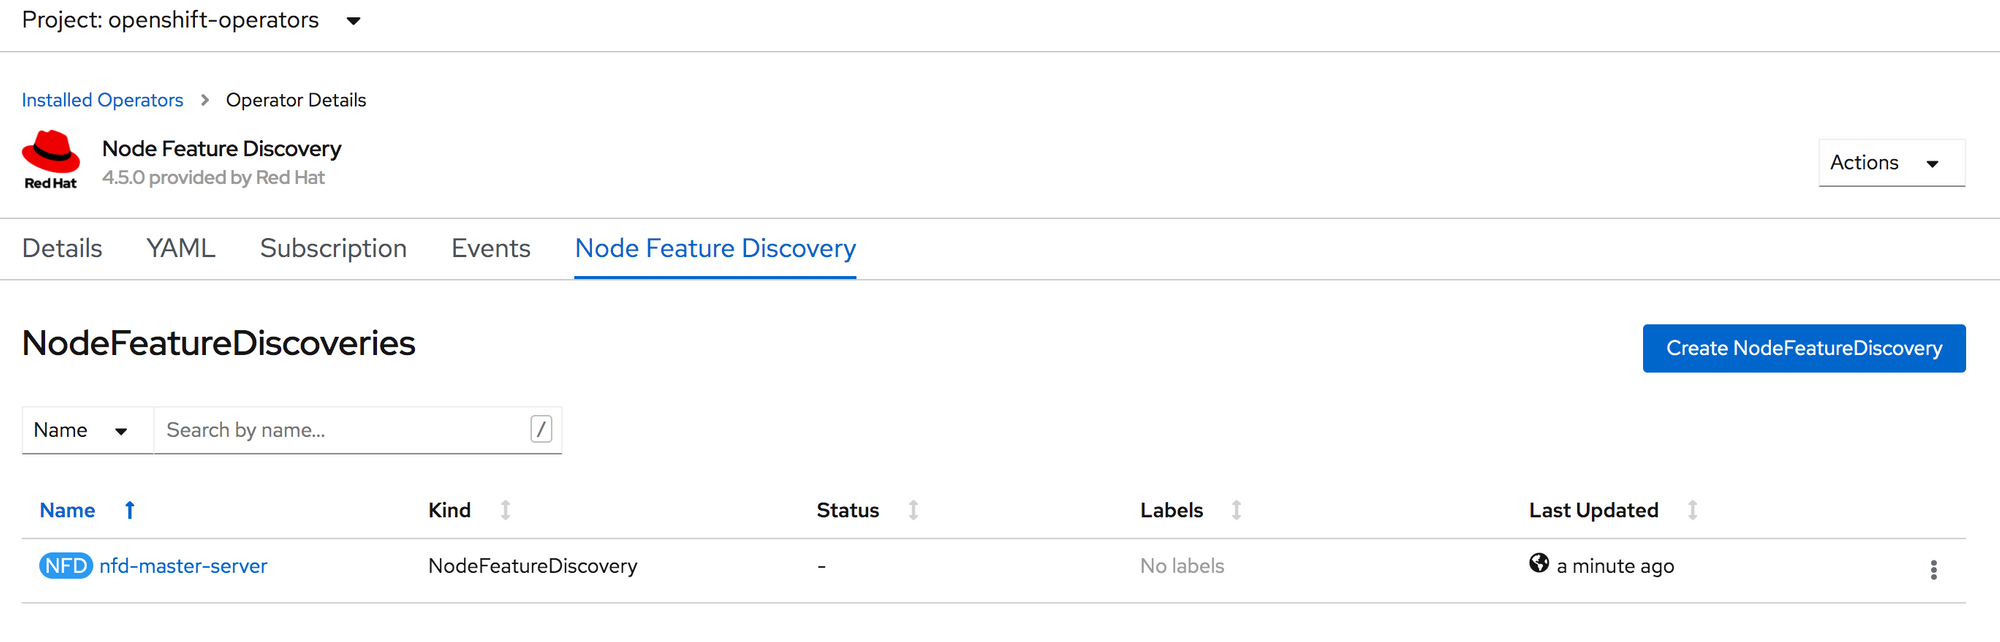
You now have an instance of NFD called nfd-master-server.
If you go to Workloads -> Pods and select the openshift-operators project. You’ll see a list of pods similar to below. Notice the nfd-master and nfd-worker pods.
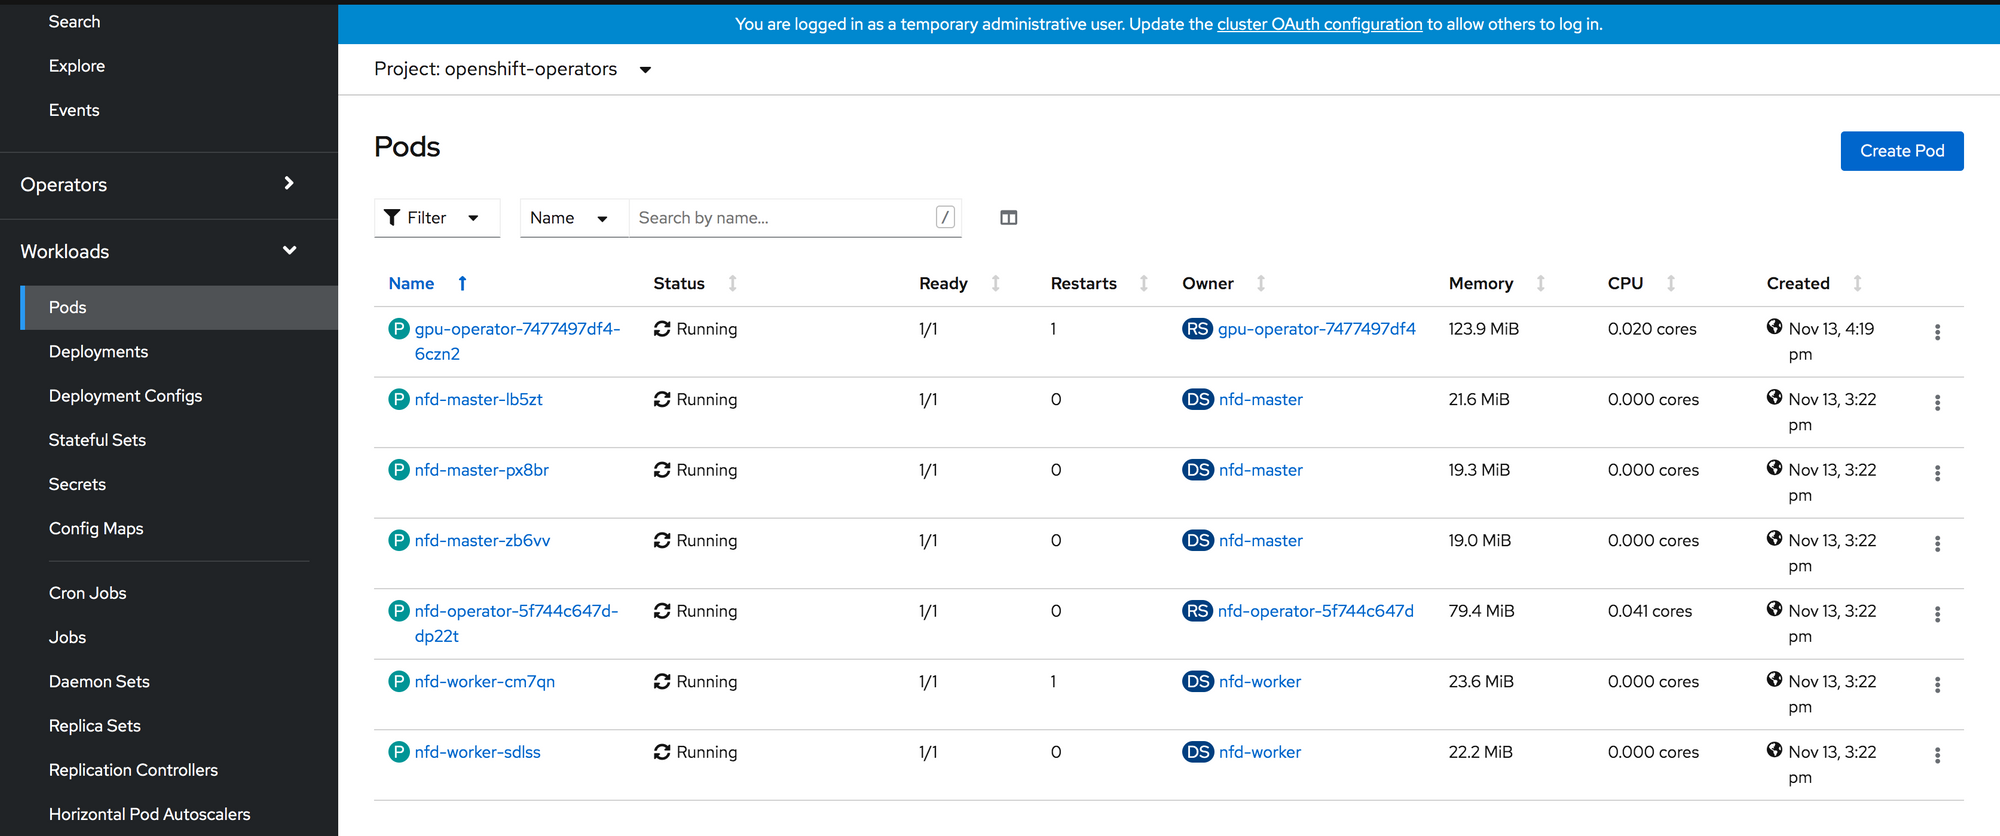
Specifically we are looking for NFD to label our GPU worker nodes with a PCI label with NVIDIA’s vendor ID (10de).
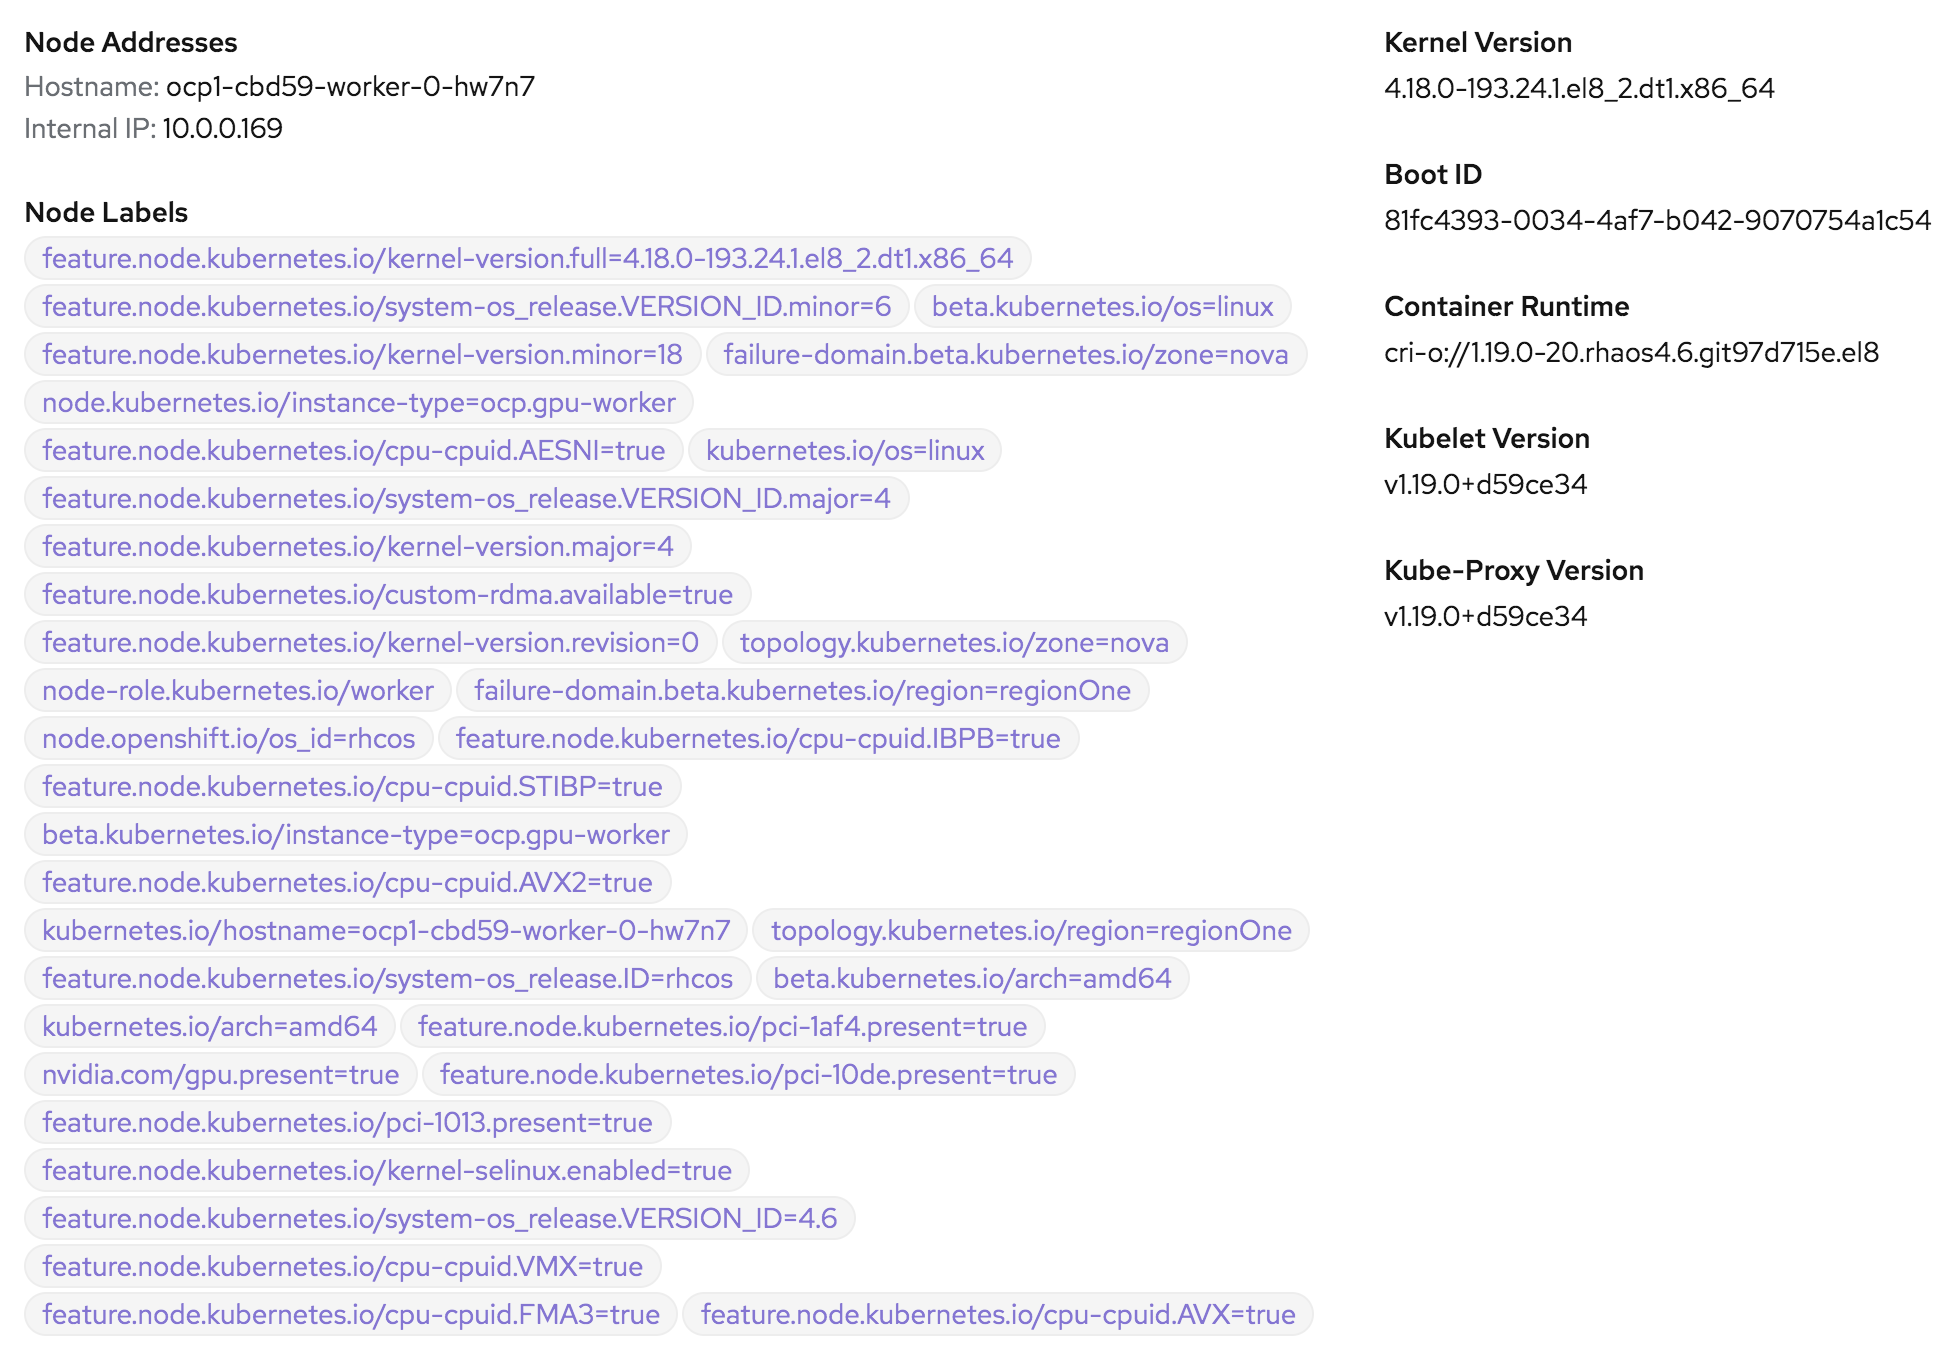
You can see in the image above two special labels:
- nvidia.com/gpu.present=true
- feature.node.kubernetes.io/pci-10de.present=true
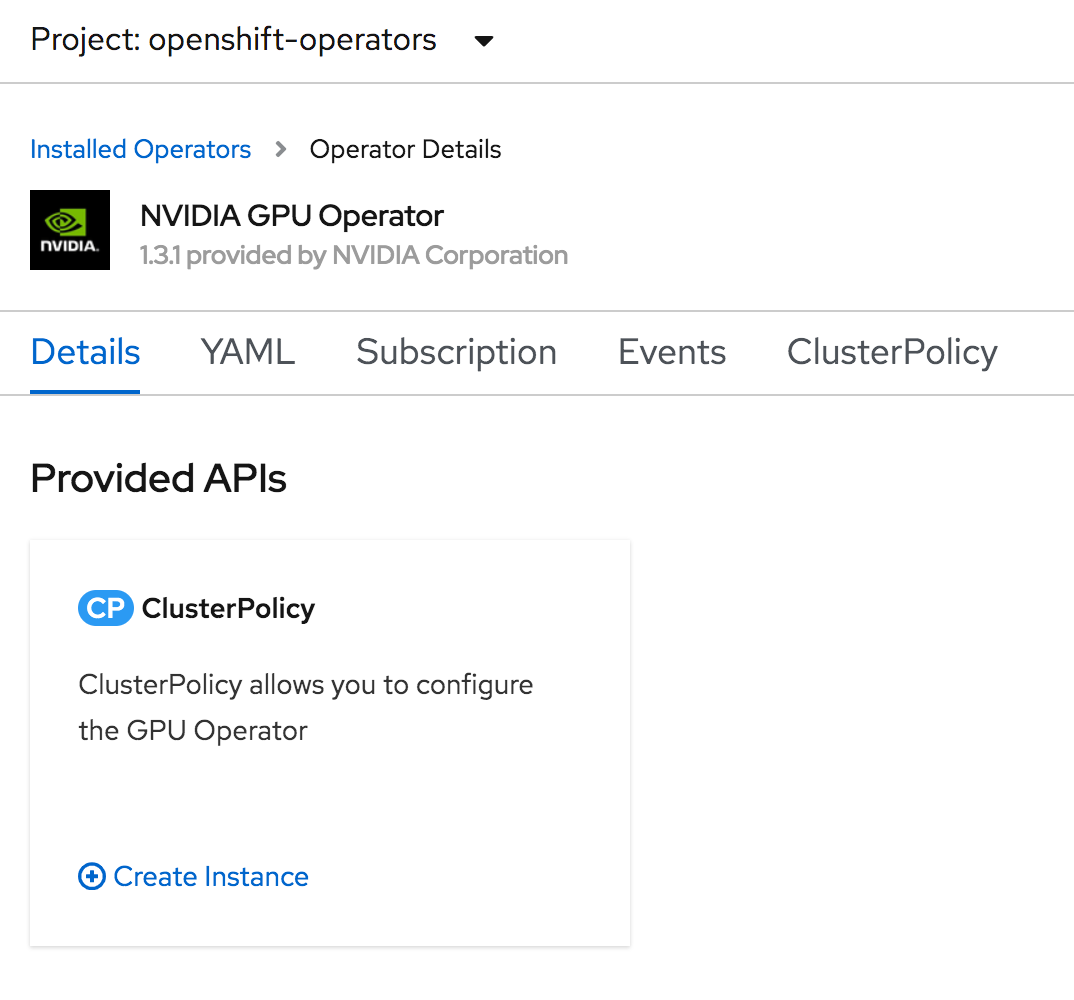
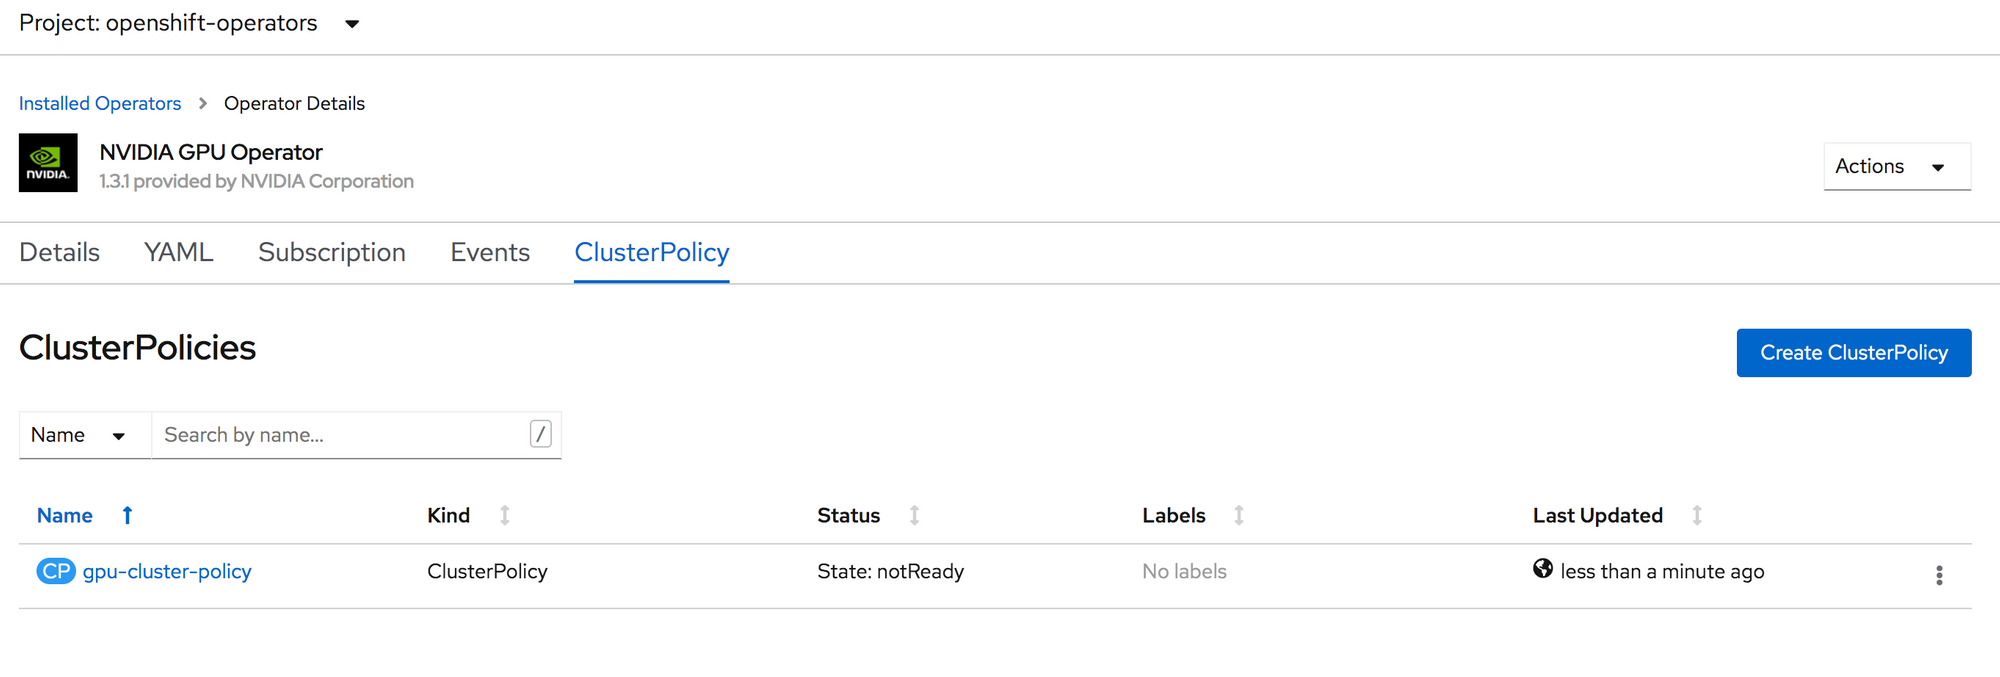
Create an Instance of the GPU Operator ClusterPolicy
Now go back to the installed operators screen and click on NVIDIA GPU Operator. On the details page, click on Create Instance for ClusterPolicy.
Leave the form as is. You can look around in the configuration options, but for our purposes here, I will leave everything with default values. Click Create.
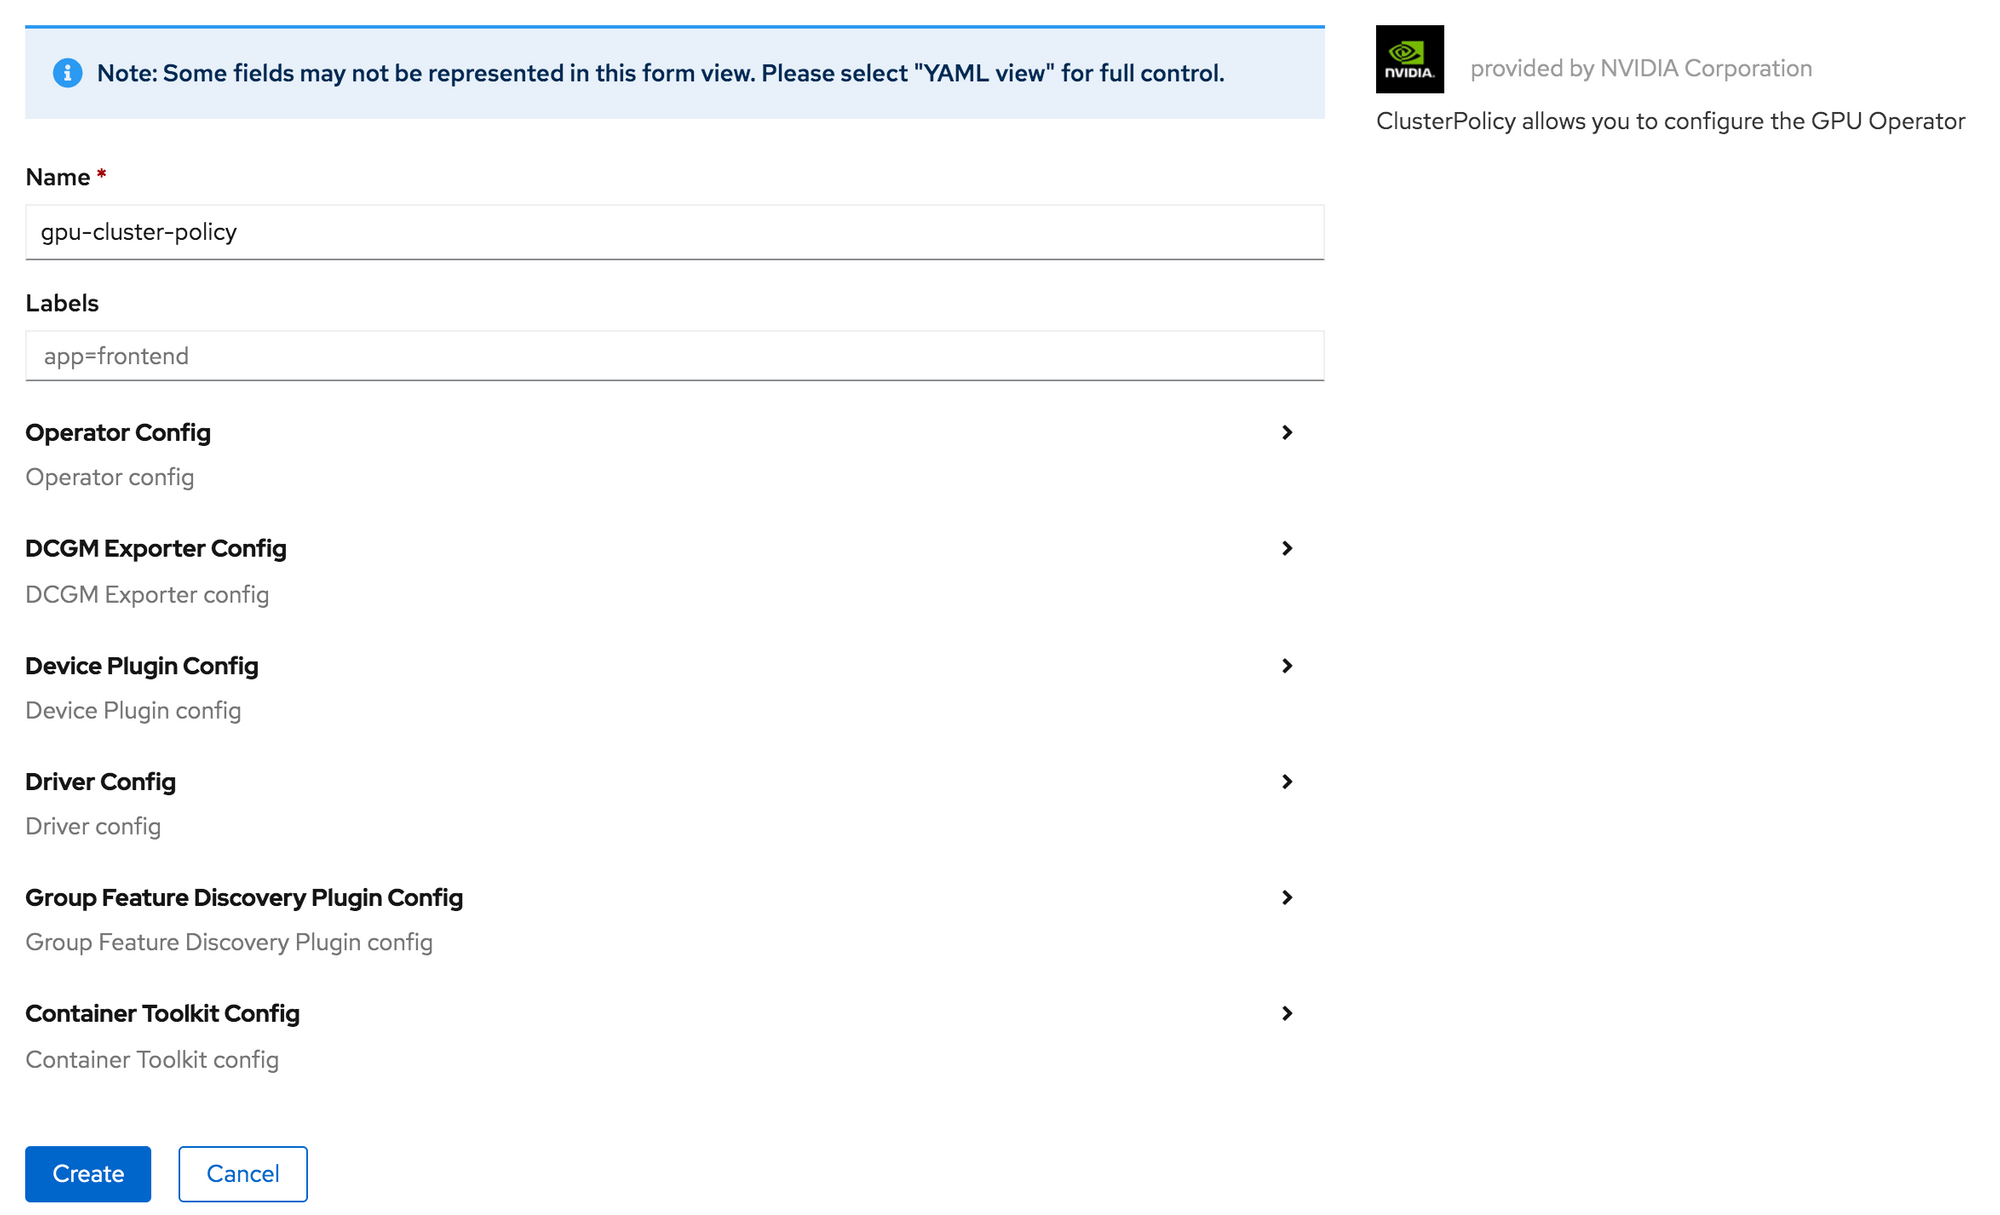
There is now a ClusterPolicy instance named gpu-cluster-policy.
Inspecting the GPU Operator Resources
Navigate to Workloads -> Pods and select the gpu-operator-resources. The key resources to look at are described below.
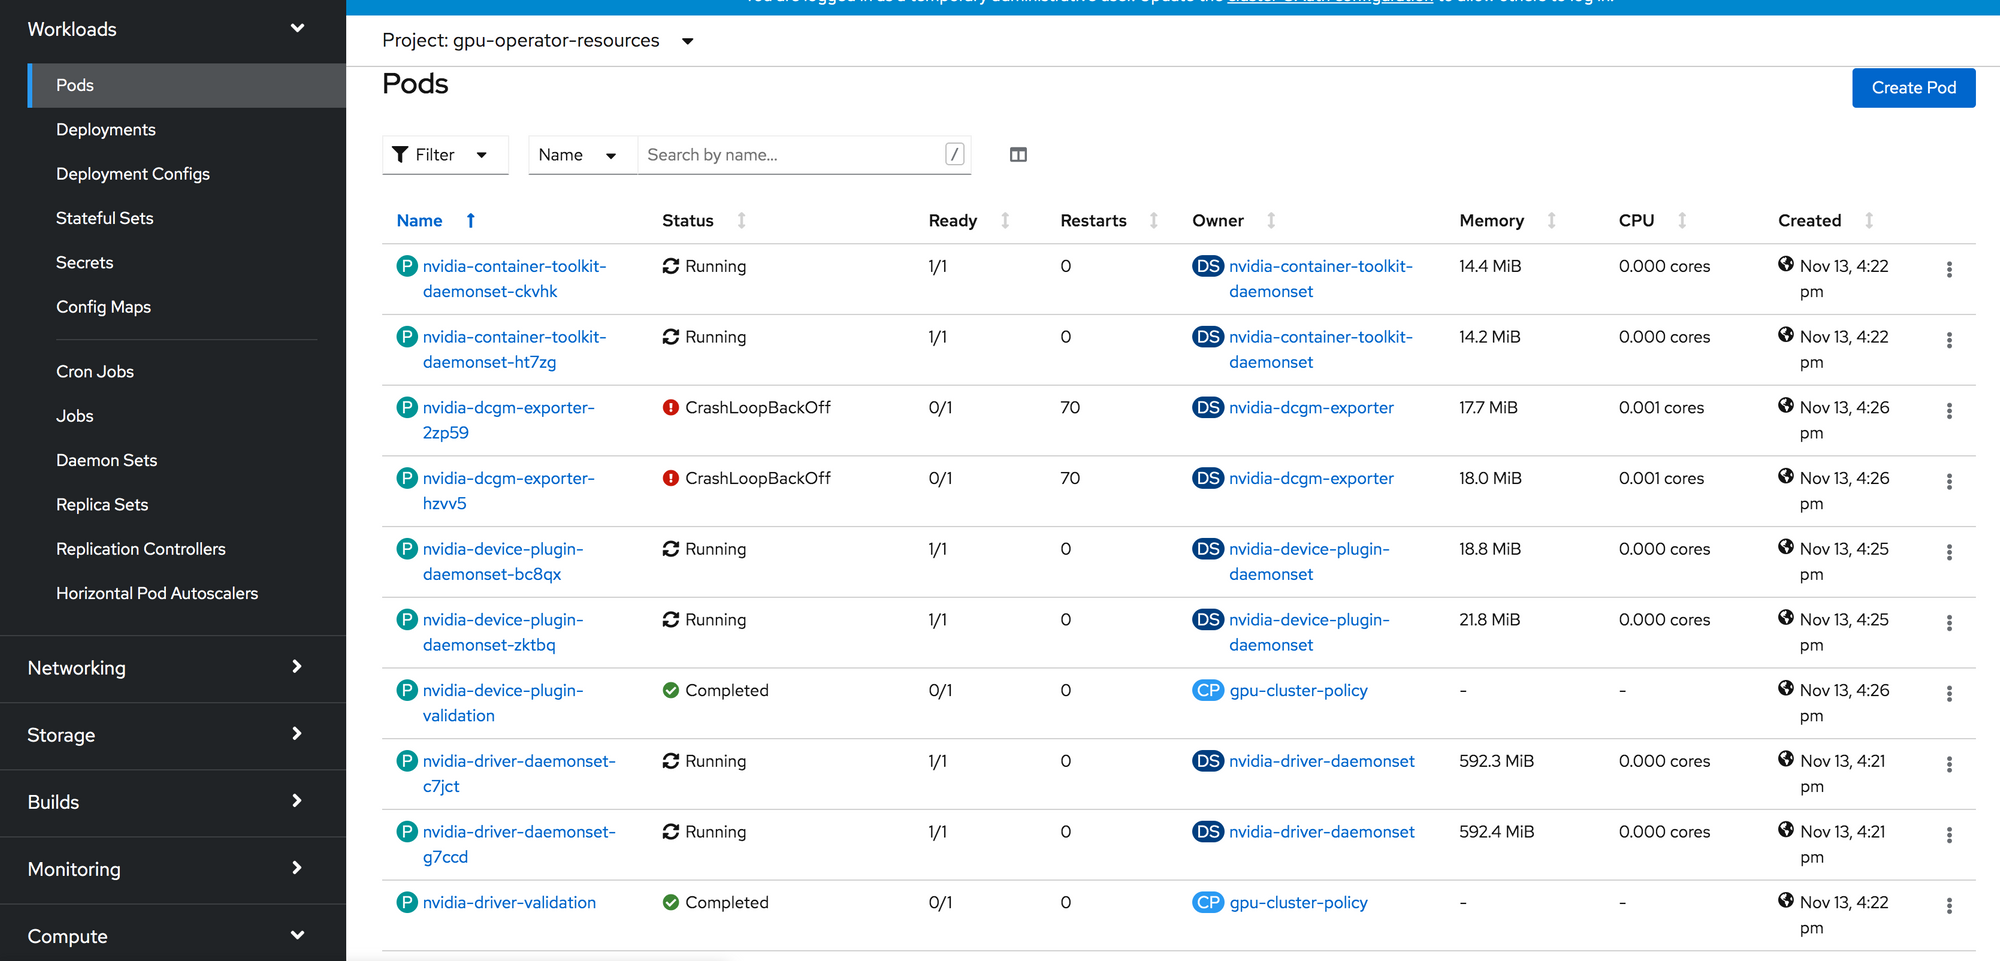
- nvidia-driver-daemonset pods (1 per GPU node)
In the driver pod logs, look for the following:
Installing 'NVIDIA Accelerated Graphics Driver for Linux-x86_64' (450.80.02):
  Installing: ...
Driver file installation is complete.
Running post-install sanity check:
  Checking: ...
Post-install sanity check passed.
Running runtime sanity check:
  Checking: 100%
Runtime sanity check passed.

Installation of the kernel module for the NVIDIA Accelerated Graphics Driver for Linux-x86_64 (version 450.80.02) is now complete.
And in the terminal for the driver pod you can run nvidia-smi to see your GPU is available.

- nvidia-container-toolkit pods (1 per GPU node)
- nvidia-driver-validation (1 pod runs a simple vector addition test to completion)
The driver validation must complete for the device-plugin and dcgm-exporter pods to deploy. In the driver validation logs you should see:
[Vector addition of 50000 elements]
Copy input data from the host memory to the CUDA device
CUDA kernel launch with 196 blocks of 256 threads
Copy output data from the CUDA device to the host memory
Test PASSED
Done- nvidia-device-plugin (1 pod per GPU node)
The device plugin is what makes the GPUs available for request by pod specs. In the logs for the device-plugin you should see something similar to the following:
2020/11/13 21:25:30 Loading NVML
2020/11/13 21:25:30 Starting FS watcher.
2020/11/13 21:25:30 Starting OS watcher.
2020/11/13 21:25:30 Retreiving plugins.
2020/11/13 21:25:30 Starting GRPC server for 'nvidia.com/gpu'
2020/11/13 21:25:30 Starting to serve 'nvidia.com/gpu' on /var/lib/kubelet/device-plugins/nvidia-gpu.sock
2020/11/13 21:25:30 Registered device plugin for 'nvidia.com/gpu' with Kubelet- nvidia-dgcm-exporter (1 pod per GPU node)
NOTE: Ignore the DCGM Exporter error in the image above. DCGM Exporter is for telemetry on the GPUs and the GeForce GPUs I am using do not support profiling.
DCGM Exporter currently supports V100 and T4 GPUs.
In the logs, you’ll see that the DCGM Exporter initalized successfully, but shows the no profiling error below.
time="2020-11-14T03:05:23Z" level=info msg="Starting dcgm-exporter"
time="2020-11-14T03:05:23Z" level=info msg="DCGM successfully initialized!"
time="2020-11-14T03:05:23Z" level=fatal msg="Error watching fields: Profiling is not supported for this group of GPUs or GPU"
Sample Workload
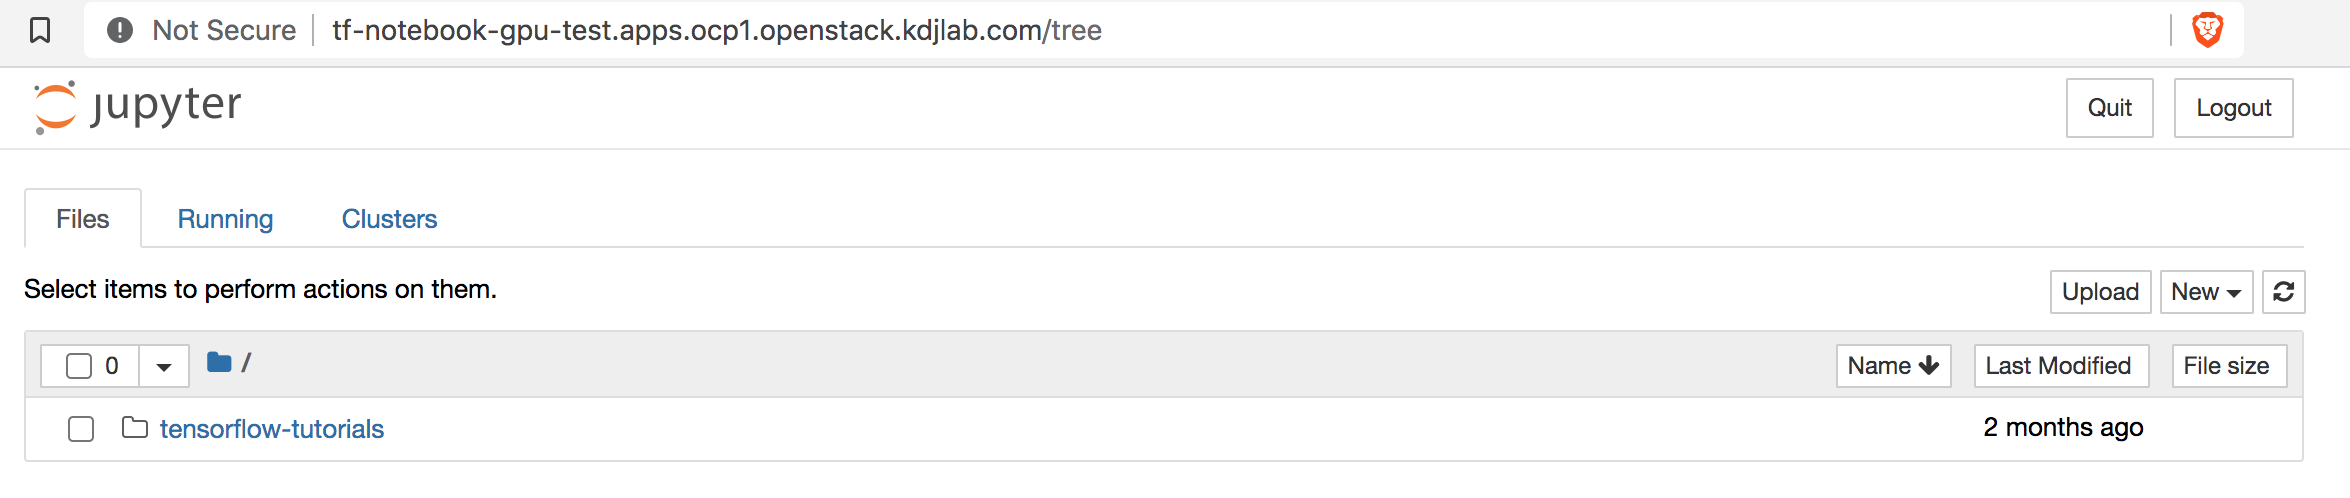
At this point we are ready to attempt a sample workload for our GPUs. The GPU Operator repository provides a sample TensorFlow Notebook to explore.
[cloud-user@ocp-provisioner ~]$ ./4.6/oc new-project gpu-test

Now using project "gpu-test" on server "https://api.ocp1.openstack.kdjlab.com:6443".

You can add applications to this project with the 'new-app' command. For example, try:

    oc new-app rails-postgresql-example

to build a new example application in Ruby. Or use kubectl to deploy a simple Kubernetes application:

    kubectl create deployment hello-node --image=k8s.gcr.io/serve_hostname

[cloud-user@ocp-provisioner ~]$ ./4.6/oc apply -f https://nvidia.github.io/gpu-operator/notebook-example.yml
service/tf-notebook created
pod/tf-notebook created
[cloud-user@ocp-provisioner ~]$
Wait until the tf-notebook is running. Then expose the service with a route.
[cloud-user@ocp-provisioner ~]$ ./4.6/oc get pods
NAME          READY   STATUS    RESTARTS   AGE
tf-notebook   1/1     Running   0          83s

[cloud-user@ocp-provisioner ~]$ ./4.6/oc get svc
NAME          TYPE       CLUSTER-IP       EXTERNAL-IP   PORT(S)        AGE
tf-notebook   NodePort   172.30.110.113   <none>        80:30001/TCP   3m50s

#Create a route for the running service
[cloud-user@ocp-provisioner ~]$ ./4.6/oc expose service tf-notebook
route.route.openshift.io/tf-notebook exposed

[cloud-user@ocp-provisioner ~]$ ./4.6/oc get route
NAME          HOST/PORT                                             PATH   SERVICES      PORT   TERMINATION   WILDCARD
tf-notebook   tf-notebook-gpu-test.apps.ocp1.openstack.kdjlab.com          tf-notebook   http                 None
Check the logs to get the login token for the notebook.
[cloud-user@ocp-provisioner ~]$ ./4.6/oc logs tf-notebook
[I 03:22:50.702 NotebookApp] Writing notebook server cookie secret to /root/.local/share/jupyter/runtime/notebook_cookie_secret
[I 03:22:50.928 NotebookApp] Serving notebooks from local directory: /tf
[I 03:22:50.928 NotebookApp] Jupyter Notebook 6.1.4 is running at:
[I 03:22:50.928 NotebookApp] http://tf-notebook:8888/?token=2e2233382cb36809288db840b621ba8bd6928bcdd3e97168
[I 03:22:50.928 NotebookApp] or http://127.0.0.1:8888/?token=2e2233382cb36809288db840b621ba8bd6928bcdd3e97168
[I 03:22:50.928 NotebookApp] Use Control-C to stop this server and shut down all kernels (twice to skip confirmation).
[C 03:22:50.932 NotebookApp]
To access the notebook, open this file in a browser:
file:///root/.local/share/jupyter/runtime/nbserver-1-open.html
Or copy and paste one of these URLs:
http://tf-notebook:8888/?token=2e2233382cb36809288db840b621ba8bd6928bcdd3e97168
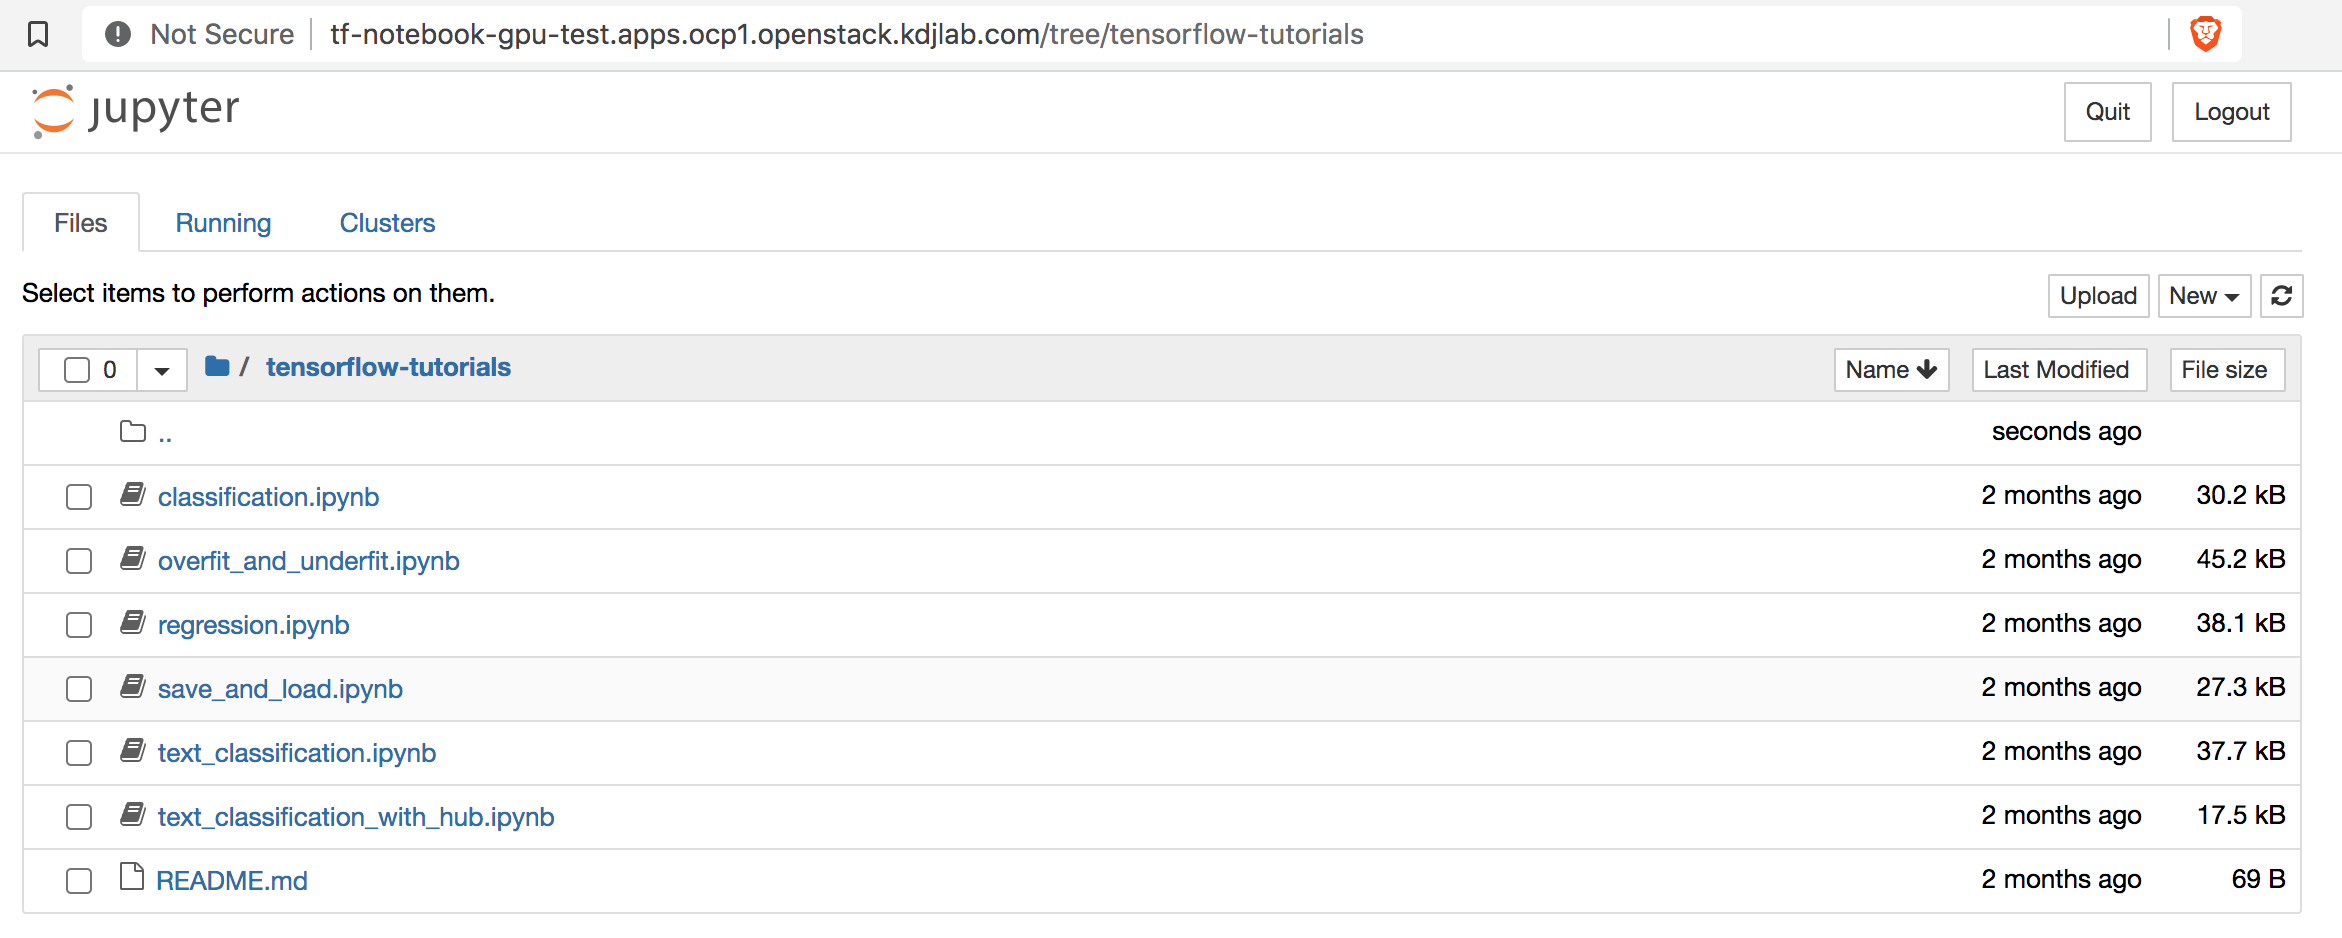
or http://127.0.0.1:8888/?token=2e2233382cb36809288db840b621ba8bd6928bcdd3e97168Then pull it up in a browser using your route + the token. You can then walk through the tutorials using your GPU to process model training and inferencing!
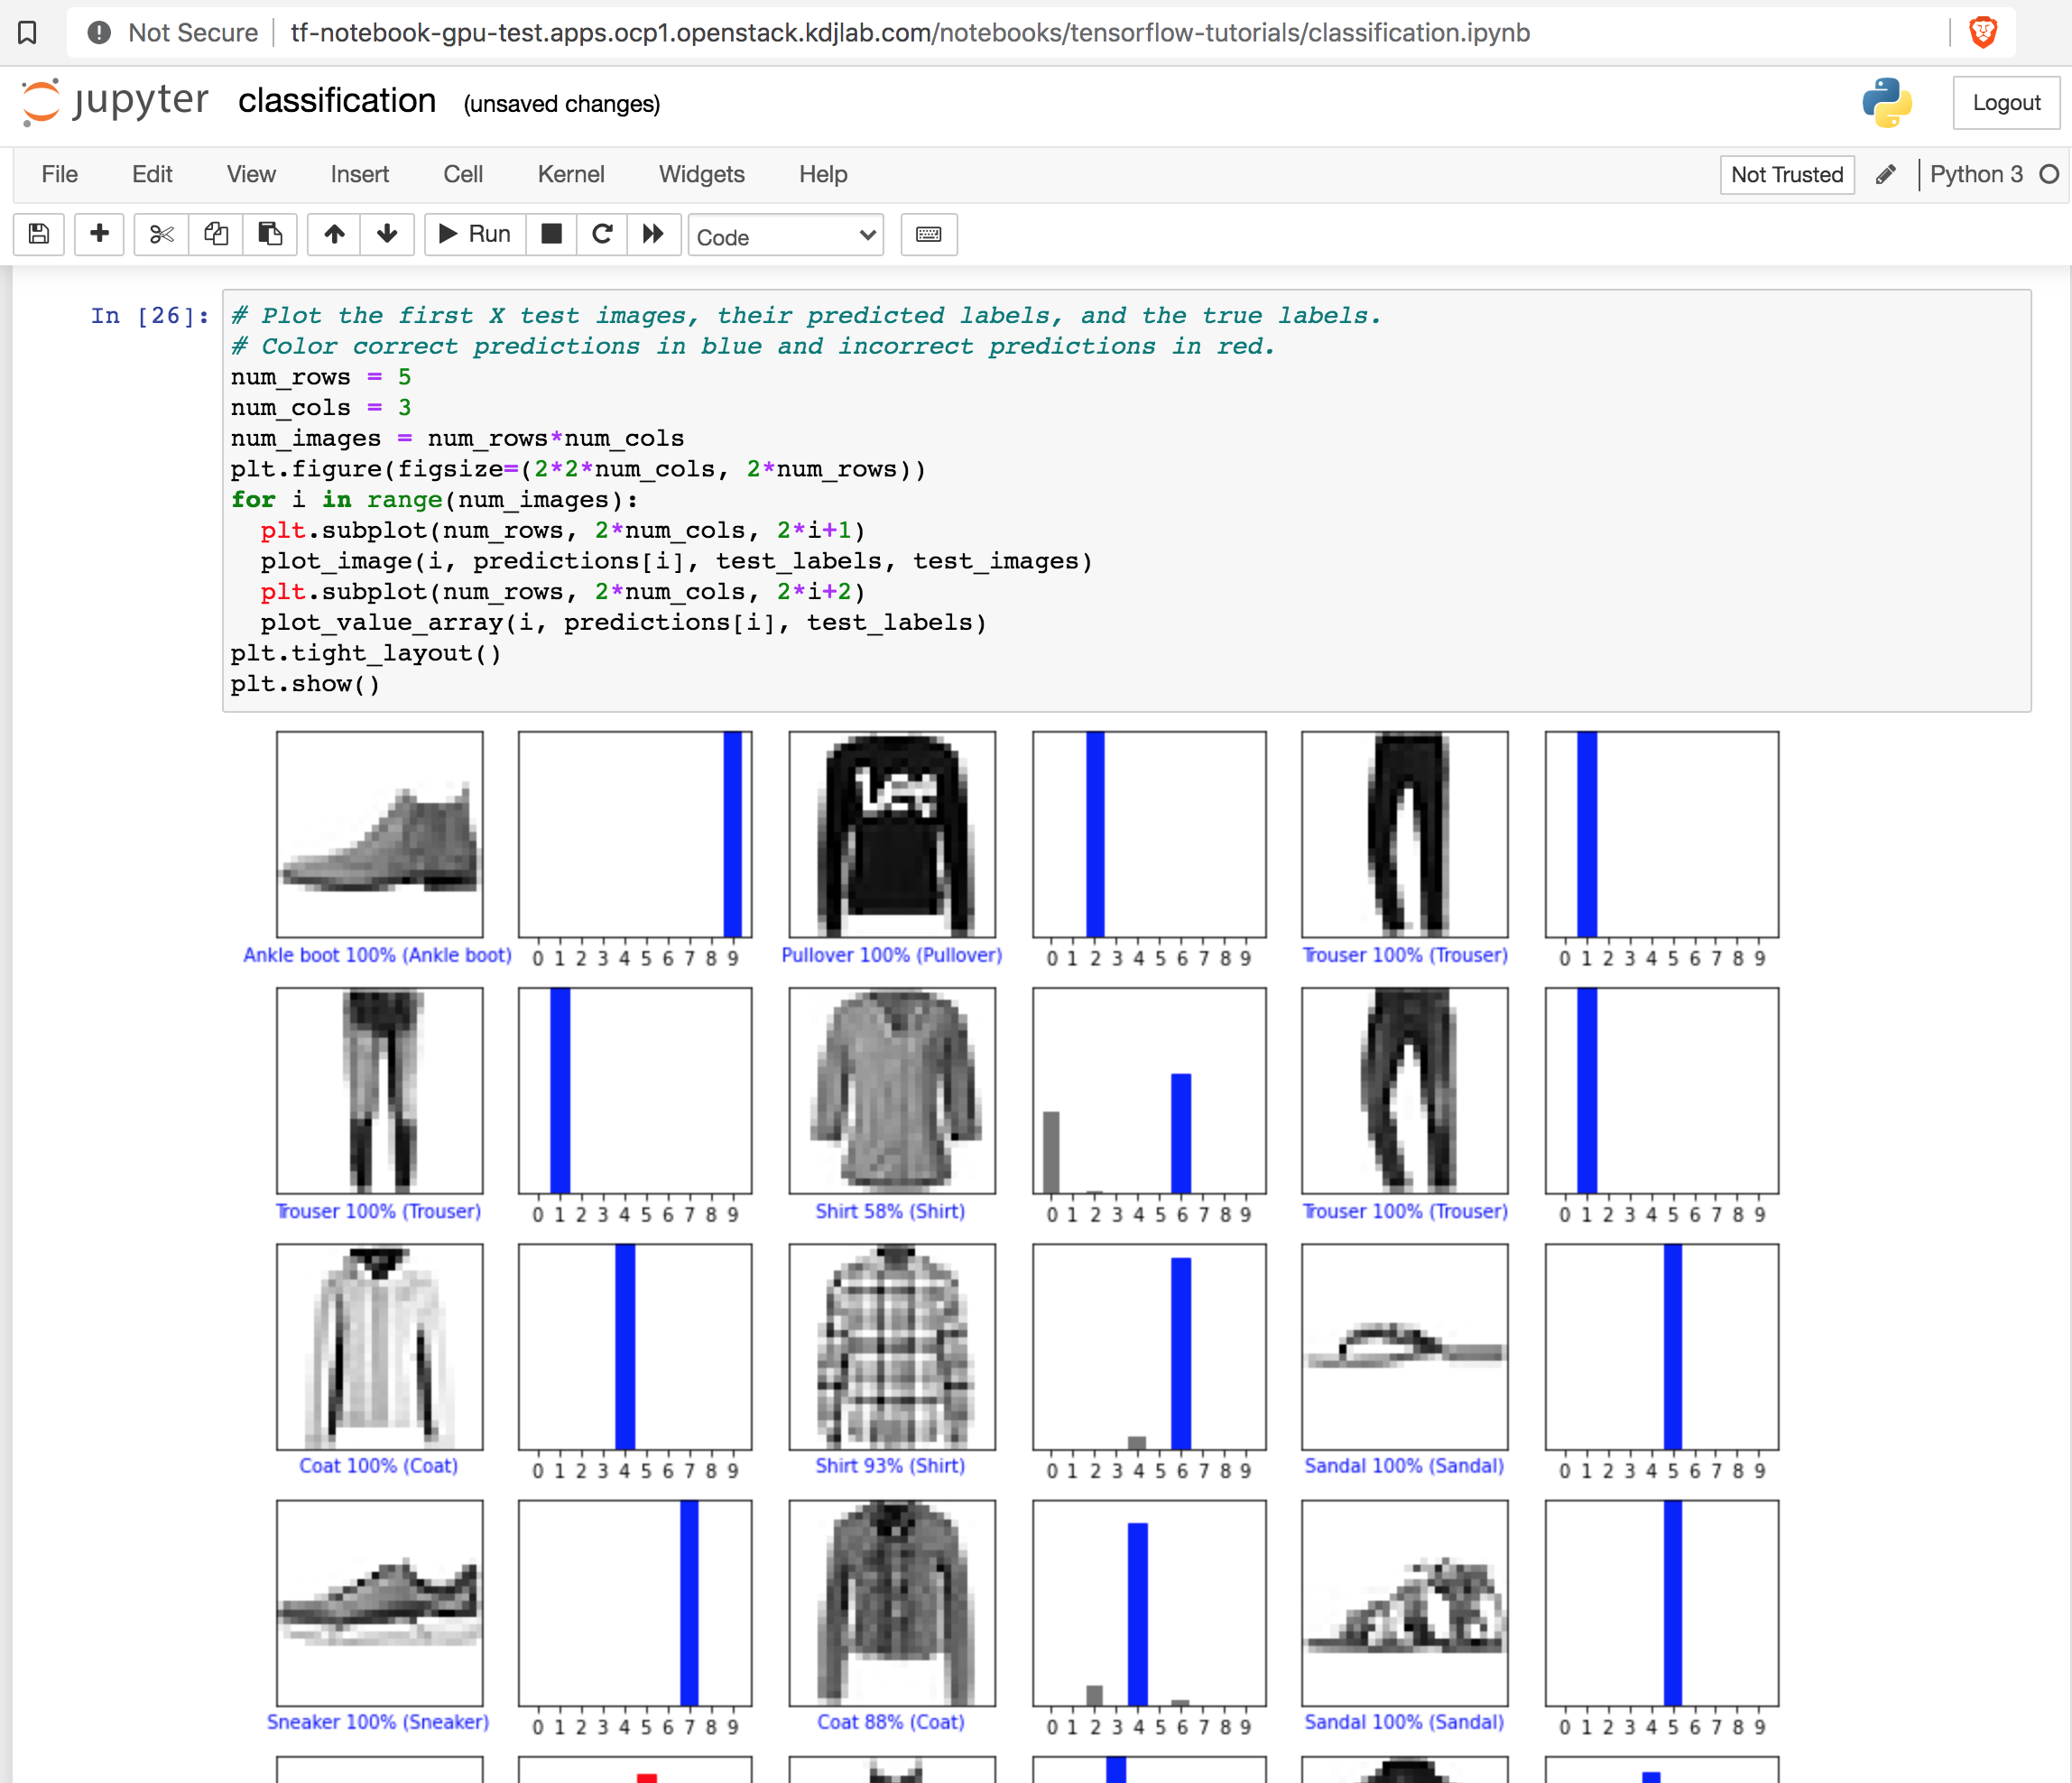
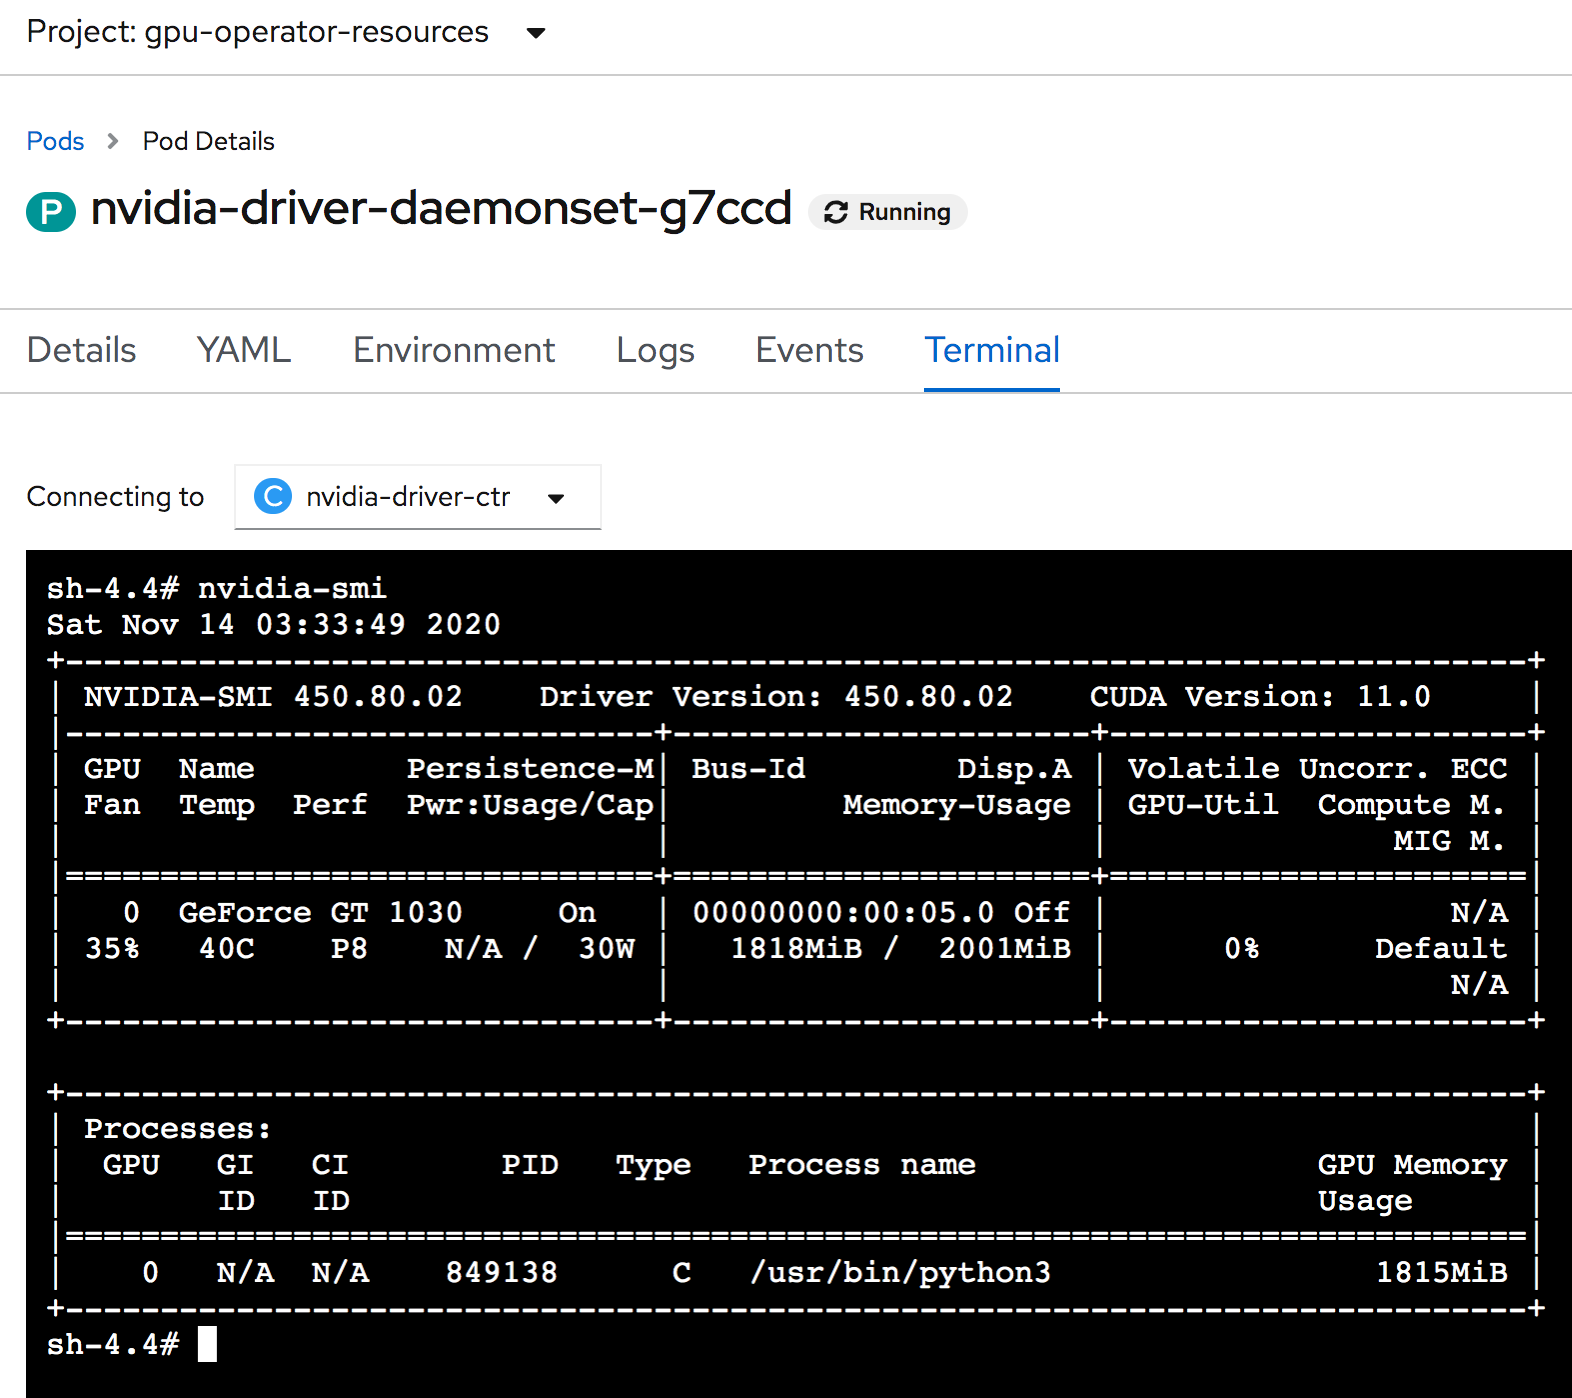
In the driver pod terminal you can see your GPU being utilized in nvidia-smi.
Conclusion
We are now successfully running training and inferencing using TensorFlow and our NVIDIA GPUs in OpenShift running on OpenStack. I did go through some hoops to get the NVIDIA GT 1030 GPUs running for this use case. In the end, I’d actually recommend investing more money in Quadro cards to simplify the deployment configuration and also for better performance capabilities. If you plan to use the GPU Operator, you need to look for GPUs that are Pascal microarchitecture or newer. Look at this Quadro list for either Pascal or Volta architecture cards.
None the less, this lab achieved what I was after which is a home lab test bed to evaluate utilizing GPUs on flexible infrastructure. If you have any questions reach out to me on LinkedIn.